Make sure you have everything ready - your PC and the installation disk(s). If you are installing Slackware as a virtual machine, make sure your VMware Player or Server are properly configured and that you have the necessary .vmx and .vmdk files. If you are installing Slackware for real, make sure that you have dedicated the necessary space on your hard disk for the installation - it can be an existing partition or some free space. To begin the installation, assuming you are using a VMware product:
- Place the Slackware DVD in the DVD-ROM tray.
- Start the VMware Player / Server and open the Slackware .vmx file.
With the virtual PC booting, hit Esc button to enter the BIOS setup. Select option 3. CD-ROM Drive. Hit Enter to start booting from CD.
After a few seconds, you will be prompted to decide what kernel you want to boot. The Slackware DVD includes a number of kernels, adapted to work with different hardware profiles. You should not be worried about this prompt; in most cases, the most suitable kernel will be automatically selected. At this stage, you should simply hit Enter to proceed.

Next, you will be asked to choose your keyboard. If you're using the standard US keyboard, just hit Enter. If not, please select the most relevant one.

A few moments later, you will begin the installation. The installation has two separate steps:
- Preparation of partitions.
- Setup of the distribution itself.
You will first have to prepare your hard disk by creating the relevant partitions (normally swap, root and home). This will be done using cfdisk (about which you can read more in my Linux From Scratch article). After the partitions are made, you will begin the standard setup, which is very similar to what you have done with other distributions, like Ubuntu, for example. To begin the installation, login as root. Type root and hit Enter.

After logging in as root, you will be prompted to partition your hard drives.

Start cfdisk - type cfdisk and hit Enter.

Although you might be alarmed by the alien look of cfdisk tool, it is no different than the fancy color GUIs used by modern, popular distros. The principles are the same.
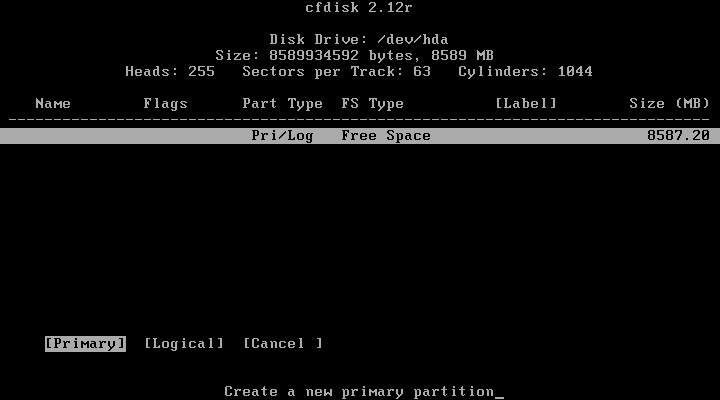
As you can see, we have a single hard drive with the size of 8GB, labeled /dev/hda. It has no partition table and therefore all of the space is free. Below the highlighted line are the cfdisk commands, marked in brackets. Use the arrow cursors to navigate and Enter to select the highlighted choice.
Please note that a help sentence is displayed at the bottom of the screen, explaining the meaning of each command, in case it is not self-evident.

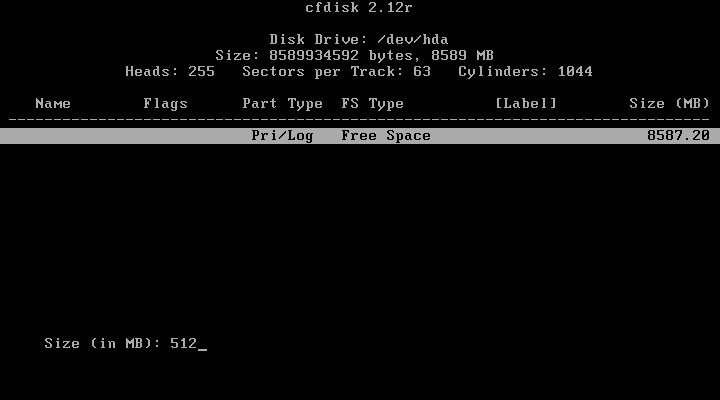
We need to create partitions, namely swap, root and home. As usual, I will begin by making a swap partition, equal in size to the RAM (512MB), after that a 5GB root partition and dedicate the remaining space to the home partition.
To create a new partition, move the highlight mark to the [ New ] command and hit Enter.

You will be prompted to select the type of the partition - we need [Primary].
Next, you need to set the size for the new partition.
You need to decide where to create the partition - at the beginning or the end of the free space. Theoretically, this should not make any difference today. However, very old computers with old BIOSes are incapable of reading beyond the 1024th sector of the hard disk (roughly 8GB). This means that if you were to place your root partition at the end of a large drive, it is possible that you would not be able to boot from it. Alternatively, you could place a small boot partition at the beginning of the drive in order to solve this potential problem. But why make things difficult?
Keep It Simple Stupid is the Slackware motto.
In our case, we are safe, regardless of where we place our partitions, since the hard drive is only 8GB. Nevertheless, for the sake of simplicity, it is best to start at the beginning of a drive. It also helps relate to the partitions when they need to be mounted.

The partition will be created. It is labeled hda1 - first partition on the first IDE drive.
Now, we need to set its type. By default, every new made partition is marked as Linux. We need to mark this partition as our swap, for latter use in the setup. Highlight [ Type ] and hit Enter.

Although this next screen might seem confusing, it is very simple. We are looking for a Linux swap designation. The desired filesystem can be found under entry 82 Linux swap. Write down the number and press any key to continue.

Now, write down the number (82) and press Enter.

We have our Linux swap successfully configured. Now we need to repeat the same process for root and home. Again, highlight the [ New ] command and create a new partition. Set the necessary parameters as [Primary], 5000MB and [Beginning]. It's the same process as above.

After the root partition is created, we need to make it bootable. This means that our system will know that the core files of the operating system are located on this partition. You do not need to setup the type, however. This will be done during the setup (second part of the installation).

Finally, we need to create the home partition. The process is no different than before. Once finished, your partition table should look like this:

So far, no changes have been committed to the hard disk. This means that all of the steps above can be reversed or changed. You need to write down the partition table.
Before you write the partition table, make sure you are not overwriting existing, important data on a disk. Once satisfied with your choices, highlight the [Write] command and press Enter.

You will asked to confirm your choice. Type yes and press Enter.

Once the partition table is written, a message will be displayed at the bottom of the screen. Now quit the program.
