Updated: October 5, 2011
After showing you how it's done in openSUSE a few weeks back, plus the rather trivial process in the Ubuntu family, it's time to focus on CentOS. I'm going to show you two methods of how to configure your Nvidia graphics card with the proprietary driver. We will do it both via an external, third-party repository, similar to what we did with openSUSE, plus we'll try the old-school method, too. The bulk of this tutorial will focus on manually installing and configuring the driver. You may find it a bit unnecessary, but the exercise will surely be worth it.
I will demonstrate the installation of the latest Nvidia driver on my LG RD510 laptop that runs a 64-bit edition of CentOS 6.0 and, as it happens, comes equipped with a still fairly handsome 9600M GS card, with 512MB RAM. We will learn how to get the necessary tools for building the driver, how to resolve a conflict with the default Nouveau driver, some command line work, and a few more tricks. It should be enlightening.
Manual method (the hard way)
This procedure is required if you do not feel like using external repositories or may be facing conflicts with repository priorities. Moreover, you might opt for this method if you must have the latest and greatest Nvidia driver, which is available from the official website, but which may not yet have landed in the repositories.
Step 1: Download the driver
Head to Nvidia site and download the driver. Very simple.
Step 2: Update your system & build tools
It is important to fully update your system before proceeding with the driver installation. The reason for this is that your running kernel may be older than the kernel source available in the repositories, so this will cause compilation conflicts.
Therefore, first max. update the system:
yum update
Reboot if necessary for your latest kernel to load. Then, install kernel source, kernel headers, make and gcc, just like in the good old times!
yum install kernel-devel kernel-headers gcc make
Compare your running kernel with the installed source:
uname -r
rpm -q kernel-devel
If the two do not match, upgrade and reboot until they do:
yum -y upgrade kernel kernel-devel
Once this step is complete, we can move on.
Step 3: Blacklist Nouveau
The Nouveau driver ships with CentOS, enabled by default. It's this driver that allows the fancy high-resolution boot splash and whatnot. If you want Nvidia, then you will have to remove this driver first.
This can be accomplished in several ways. The quickest and simplest way is to add a small entry to the kernel line in the GRUB menu.lst file. Just append rdblacklist=nouveau and the next time your kernel boots, it will come with the old, low-resolution Plymouth three-color bar splash and no Nouveau. The second, more permanent option is to blacklisting the module is by using the /etc/modprobe.d/blacklist.conf file. Moreover, please consult my Linux commands article for details on how to achieve this.
However, during the testing, I would recommend you only change the GRUB menu. This way, if something goes wrong, you will be able to revert the changes even if your system cannot boot. Simply edit the GRUB menu and add/remove whatever you may have changed. Otherwise, you might need to boot into the single mode or from live CD and then change the blacklist.conf file.
kernel /boot/vmlinuz <all kinds of options> rdblacklist=nouveau
Once the system boots, verify that the driver is not loaded:
/sbin/lsmod | grep nouveau
Step 4: Install Nvidia proprietary driver
Now, we need to drop to text-only console, because the driver cannot install when the graphics thingies are in use. To do this, switch into runlevel 3:
init 3
Login as root. Find the downloaded Nvidia driver on your disk. Make the file executable and then run it. Follow the prompts provided by the Nvidia installer text wizard.
chmod +x <Nvidia file>.run
./<Nvidia file>.run
Once this step is complete, go back into runlevel 5.
init 5
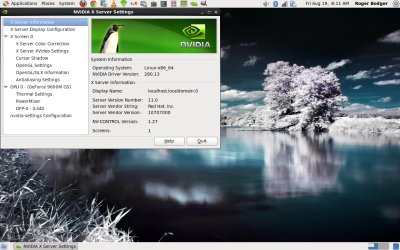
You will see Nvidia splash, which should indicate you're doing good. But just to be sure, open the Nvidia control panel and make sure the driver is working correctly. Testing Compiz and a few games is also a good idea.
Step 5: Test
And now we have some fun!


Caveats
You will need to recompile your driver every time there's a kernel update.
More reading
This same method also applies to Scientific Linux, so check that one out.
Furthermore, some tips of making CentOS a perfect desktop, as well as managing repositories smartly.
Repository method (the easy way)
For most people, this is the preferred solution, as it will allow you to receive Nvidia card updates just like other applications and tools and libraries, and you will not have to manually recompile the driver whenever a new kernel is installed.
The procedure is essentially identical to what you've seen in openSUSE, except that you will have to manually add and configure the external repository and set the right priority to avoid conflicts with your base install and/or other sources you may have enabled. This is the one difficult step, as some users might be a bit apprehensive about changing their system configuration.
Currently, the ELREPO and EPEL repositories contain the Nvidia binaries. Other repositories may add them in the future. You may also have to blacklist Nouveau to be able to install the driver. Please choose the correct driver that matches your kernel.
Links to these repositories are available earlier in this article, so if you missed the them, go back and hunt a little. Seriously, the linked articles are there for your convenience, while extra traffic is of secondary importance.
It may be more difficult to see using the Add/Remove Software window, so you might want to try the command line. Execute yum search nvidia | grep <version number> to narrow down the searches to a specific Nvidia version. For example, at the time this article was written, I chose 280.13, which is currently the latest driver. Then, execute uname -r to see what kernel version you're running. Then, in the search results, look for the specific driver with the kernel version string that matches yours. Again, similar to openSUSE.
For kicks, here's the graphical interface screenshot:

Conclusion
If we ignore the third-party repository trick, which is definitely a healthy addition to sane computing, the default CentOS mandates you go back to school in order to enjoy your expensive cards as intended. But this may not be such a bad thing, after all. Dabbling a little bit in the command line is a healthy refreshing exercise. It's not painful and should not be frightening. On the contrary, you learn about control and gain expertise.
This tutorial has taught you many things: how to update your system and install build tools, how to make sure there are no issues with the kernel sources, how to blacklist the Nouveau driver, how to switch between runlevels, how to install and test the Nvidia driver, a few more tricks, and all of this from the command line. Best of all, if you don't care for any of these, no worries, there's an alternative, simpler way. You gotta love it.
Anyhow, I stand by my decision to deploy CentOS on my production systems. It's a wise and efficient decision. It truly is a perfect desktop, and if you have an Nvidia card, then here's a guide on how to fire it up properly. Enjoy.
Cheers.