Updated: January 3, 2018
Several weeks ago, I reported that my Lenovo IdeaPad G50-70 laptop, which I mostly use for multi-boot Linux distribution testing, has had its UEFI (BIOS) NVRAM go read-only, refusing to boot from external media. It would also not allow any UEFI settings to be changed.
A few days ago, I finally managed to resolve this issue, by using the mainline kernel 4.14.10, which offered a new set of (affected) drivers that unbricked the UEFI memory. I would like to show you the full sequence of steps you need to undertake to resolve the problem. After me.
Problem in detail
Let me elaborate a little more on the issue:
It occurred way BEFORE Ubuntu 17.10 Aardvark was released - I was affected several months before, just after testing openSUSE Leap 42.3. I believe the issue is more widespread, but it is the popularity of Ubuntu that helped highlight and bring awareness to the foobar, and the fact actual QA in Linux is non-existent, as I've claimed for ages.
The situation left me with a eight-boot setup that works, fortunately, with one Windows and seven Linux distribution instances installed on the internal hard disk. I could continue updating these systems, and upgrade them to newer versions - I just wasn't able to boot any fresh media, hence attempt new installations and test from USB devices.
I tried several methods - short of any hardware change - in trying to resolve the problem, including removing the battery, BIOS update, and a few other tricks, to no avail. I also received numerous emails from helpful fans, who pitched in their ideas and suggestions. Some of these will feature in a follow-up article, as it is possible that the solution today may not resolve the read-only problem for everyone, and they might still be looking for other workarounds.
Indeed, I wrote a workaround article for how you can still boot new systems despite the limitations imposed by the read-only UEFI. I used the raw-disk access feature in VirtualBox. This is a risky, experts-only method, but it works. We will have a follow-up article offering several other ways of booting new media on the affected hardware.
Lastly, a few days ago, several users reported testing the kernel 4.14.9, and that it indeed fixes the issue. I have to say that the presented solution on Launchpad is partial, incomplete, and inadequately explained, and requires additional clarifications. Moreover, I decided to test to see whether this works.
Short answer - it does, but not quite as explained in the Launchpad bug report. Long answer, let me show you what I did exactly. Also remember that this may not work for your particular model, and that your setup may be somewhat different than mine.
Important notes before we proceed
Please remember:
- I do not have Ubuntu 17.10 installed on the Lenovo machine - but it does not matter.
- I will install the new kernel on a Ubuntu 17.04 flavor - one of the eight operating systems available on the machine.
- The boot sequence is controlled by openSUSE - not Ubuntu - so we will need to take this into account when attempting to fix our UEFI.
Solution
In a nutshell, I decided to install UKUU (a kernel update utility) in Xubuntu 17.04, which is installed as one of the eight operating systems on the affected box. I do not have any Ubuntu 17.10 installed, as the issue happened way before, and I never got to test Aardvark on the Lenovo laptop.
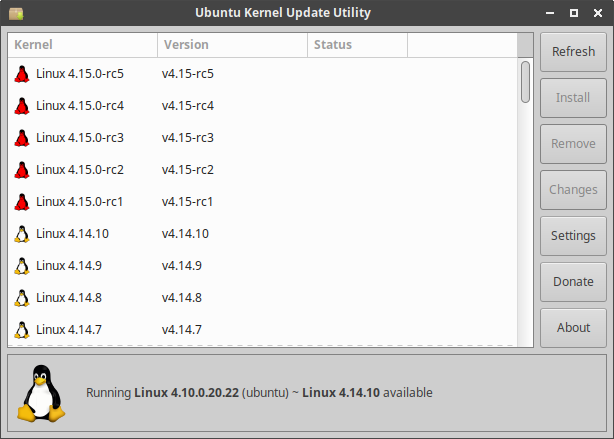
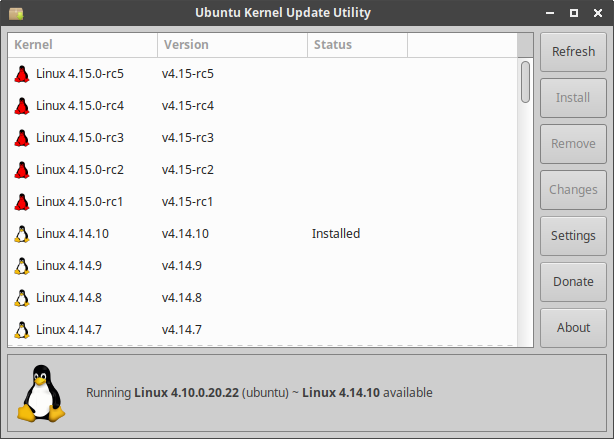
Get the new kernel - UKUU
We will need a new kernel. At the moment, kernel 4.14.9 is not available as part of the standard Ubuntu range. You will need to install this kernel from the official mainline repository. There are many ways to achieve this. The simplest, most straightforward one is to use the UKUU - the kernel update utility for Ubuntu-based distributions. There's a PPA available for Ubuntu, which makes it easier to setup and use. Command line setup:
sudo apt-add-repository -y ppa:teejee2008/ppa
sudo apt-get update
sudo apt-get install ukuu
Kernel installation
I actually had to run the program THREE times before it successfully installed the new kernel. The first two times, I hit various errors. Do not let this discourage you, and try again until it successfully installs.
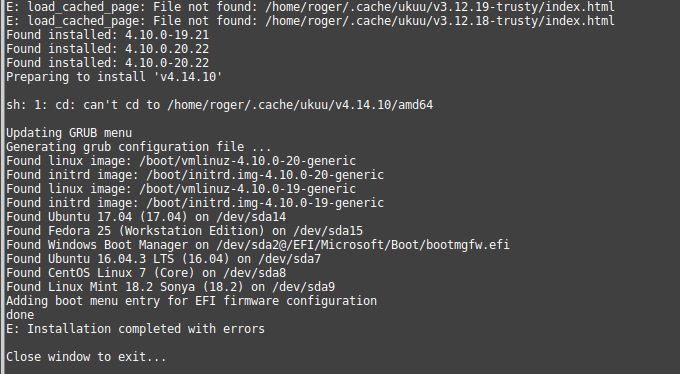
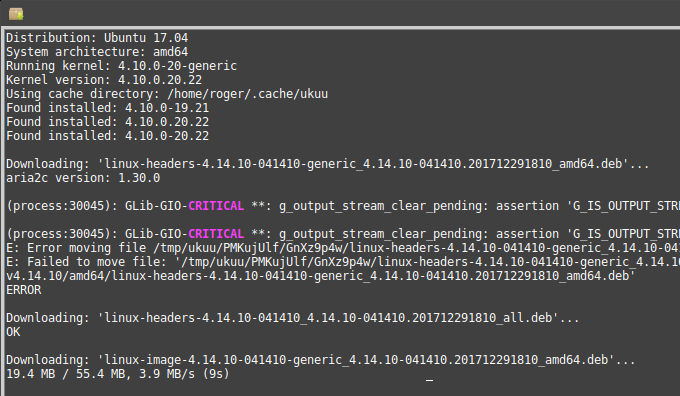
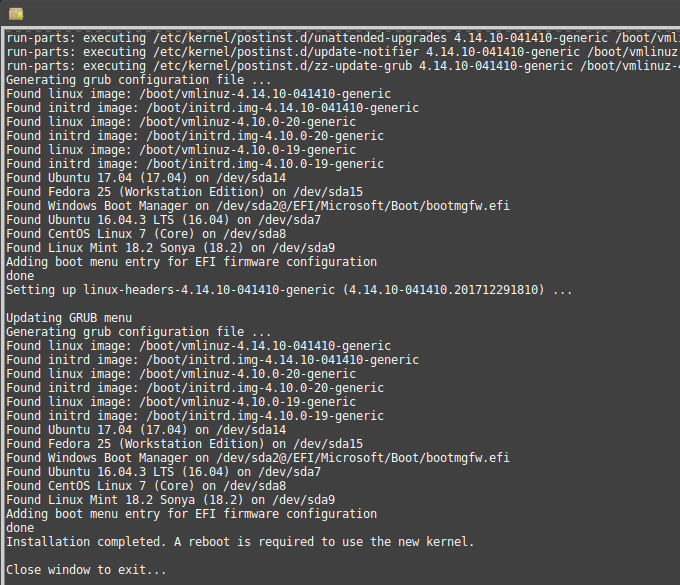
The first two times, the tool complained about cache errors, and both times, there was no new kernel under /boot. The third time it worked. But then, our work is not done yet! Indeed, the next step is to reboot.
From this point on, the actual steps for you and me may differ. If you are single booting and/or multi-booting, but the particular instance of Ubuntu is in charge of the bootloader, you just need a single reboot. But in my case, we first need to boot into openSUSE, as it is the one that controls the boot sequence, and update its GRUB menu. After that, a few more steps.
1st reboot, update GRUB menu in the distro that controls the system
You will need to read my GRUB2 tutorial to fully understand what needs to be done next. In essence, we need to update the menu. SUSE will then generate a new one, and it will also include the right entry for our Xubuntu and its new kernel 4.14.10. For SUSE:
grub2-mkconfig -o /boot/efi/EFI/<os>/grub.cfg
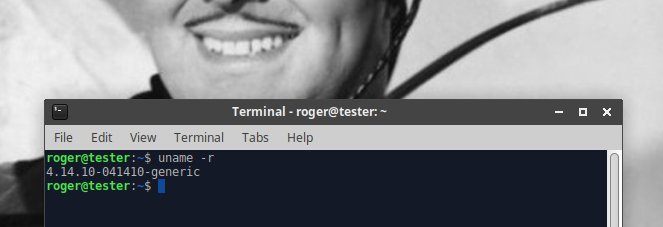
2nd reboot, into distro + kernel 4.14.10
Now, in the new kernel, inside our Xubuntu, we need to INSTALL GRUB. In other words, we will overwrite the SUSE bootloader. With read-only NVRAM, this did not work, resulting in the interrupted system call as we saw in my original report. But with the new kernel in place, the GRUB setup should succeed, as I've outlined in my GRUB2 & EFI recovery guide.
sudo apt-get install grub-efi-amd64
And this worked fine and WITHOUT any errors:
Installing for x86_64-efi platform.
Installation finished. No error reported.
Generating grub configuration file ...
Found linux image: /boot/vmlinuz-4.14.10-041410-generic
Found initrd image: /boot/initrd.img-4.14.10-041410-generic
Found linux image: /boot/vmlinuz-4.10.0-20-generic
Found initrd image: /boot/initrd.img-4.10.0-20-generic
Found linux image: /boot/vmlinuz-4.10.0-19-generic
Found initrd image: /boot/initrd.img-4.10.0-19-generic
Found Ubuntu 17.04 (17.04) on /dev/sda14
Found Fedora 25 (Workstation Edition) on /dev/sda15
Found Windows Boot Manager on /dev/sda2@/EFI/Microsoft/Boot/bootmgfw.efi
Found Ubuntu 16.04.3 LTS (16.04) on /dev/sda7
Found CentOS Linux 7 (Core) on /dev/sda8
Found Linux Mint 18.2 Sonya (18.2) on /dev/sda9
Adding boot menu entry for EFI firmware configuration
done
Setting up grub-efi-amd64-signed (1.80.2+2.02~beta3-4ubuntu2.2) ...
Installing for x86_64-efi platform.
Installation finished. No error reported.
3rd reboot, everything should be fine now
If this your attempt was successful, then you should see the changes reflected, like a new GRUB menu, which indicates that we had a successful recovery of the BIOS/UEFI. In my case, the SUSE menu was gone, I had an Ubuntu boot menu. Also, booting from external media, like USB devices, works nicely again. We're back in the game.
Potential problems
As even UKUU warns you, there could be issues running a vanilla kernel on your system. The thing is, if you have a multi-boot setup, you only need it once to resolve the problem, and after that, you can go back to using the distro's standard channel - of course, make sure you do not reinstall the OLD and BUGGY kernel + drivers.
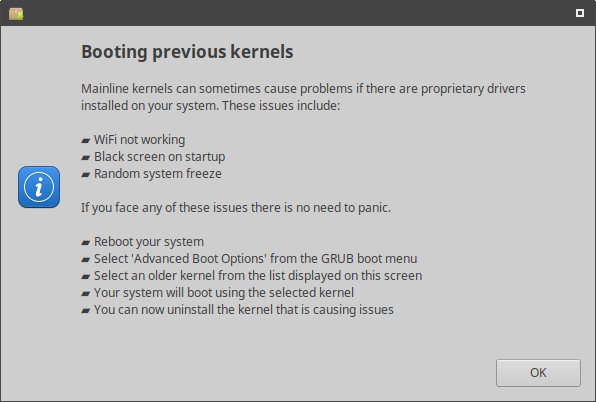
My test on the Lenovo G50 shows that there are no adverse issues with this kernel. I had all my hardware properly initialized and used. However, you may experience different results.
Other kernels
I also tried kernel 4.15-RC in openSUSE (obviously BEFORE the above test), which is running its own kernel repo, as the default version on Leap 42.3 had abysmal hardware support on the G50 laptop. Alas, this did not yield the desired results. So I guess whatever is in the higher revision of the kernel for openSUSE does not seem to include the necessary fixes, and so your best bet is try the mainline kernel 4.14.10 for the time being, with the easiest method of installation through UKUU.

Conclusion
There you go. This tutorial should hopefully help you resolve the problem with the read-only BIOS/UEFI NVRAM on your laptop, probably the Lenovo crop, but it's also possible this should work on other models from other manufacturers. We used a new kernel 4.14.10 and (re)installed the GRUB, which gave us our system back. I tested this on Xubuntu 17.04 in a very complex multi-boot setup, so this is not exclusive to Aardvark.
We learn a few things here: non-existent QA in Linux, there could be horrible problems that can brick your hardware just from some innocent testing, it's best to wait and not rush with trying to fix something like this (e.g. buying a new motherboard), and once there was a software-based solution offered, it took several steps to fully implement.
Please be diligent, and do not skip any instruction listed here. UKUU might take a while to install the kernel, and after that, you still need to make sure the bootloader is reinstalled. I hope you like this piece. All's well that ends well. I'm glad to have been been hit by this problem, as now I can also provide a solution, in a way. Happy Linuxing, see you around.
Cheers.