Updated: March 12, 2011
Here's a tricky topic. If you google for this, you won't find that many articles. There are very few good reviews and tutorials on Linux OCR. And yet, being able to scan images and convert them into text is something we all need, all the time. Many of us possess books or old documents created in the era before computers became popular or scanners even existed. Today, we'd like to commit these archives to digital form before they mold and vanish forever.
To be able to achieve something like this, you will need a fair amount of effort. Luckily, my needs parallel yours. Hence, this tutorial will save you quite a bit of time by showing you how you can relatively easily enjoy high-fidelity OCR in Linux. There are many programs that claim they can do just that, however I will focus on one only: Tesseract.
After reading a bit online, browsing through existing articles on OCR, Tesseract came as the top choice for the task at hand. It provided consistently good results, including the ability to work with all kinds of backgrounds, fonts and image distortions. Well, let me show you how you can setup and start using Tesseract.
Get the program installed
Repositories, here we go. No worries there.

Real test scenarios
splitbrain.org did a very thorough and detailed Linux OCR Comparison, and it kind of served as the baseline for my own work here. In fact, I used some of the images Andreas used in his own article, so I could have a control group.
The control images are all 300dpi, in .png format:
courier-black-300.png (23.8KB, Andreas' image)
justy-black-300.png (29.6KB, Andreas' image)
courier-black-300-rot.png (14.7KB, above courier-font image, randomly rotated)
Tesseract requirements
The program is easy to use and you can even skip the training, which is intended to teach the software how to recognize tricky characters. However, it requires that you use TIF images as your input, indexed at 256 colors. Worry not, I'll show you how you can achieve this.
My own converted images are in TIF format, indexed, 256 colors:
courier-black-300.tif (392KB)
justy-black-300.tif (392KB)
courier-black-300-300-rot.tif (392KB)
Now, let's see what happens if you run Tesseract against a wrong file:

The error says: check_legal_image_size:Error:Only 1,2,4,5,6,8 bpp are supported:32
Sounds crazy and geeky. This has nothing to do with the image size, but the color depth, in fact. Tesseract requires indexes images with no more than 256 colors. A similar error would have occurred if you tried to run against a non-TIF file.
All right, so we need: a) TIF files b) indexed 256-color files. How do we change our scan images, in .png format (or any other) into what we need? Let me show you.
Convert images to 256-color indexed TIF files
OK, load your file in GIMP (you will need it for this task here).
Change Image mode
Go Image > Mode > Indexes, set Generate Optimum Palette, number of colors: 256.

Remove transparency
One more trick before we do Save As. Then, go to Layer > Transparency > Remove Alpha Channel. This will remove transparency, because TIF images cannot have transparency. If you have multiple layers, merge them down, then remove transparency.

Finally save your file in TIF (or TIFF) format. Now, we're good to go.
Tesseract in action
And some tests, gimping, command line, go!

tesseract <input file.tif> <output file.txt> -l <language>
Specify the input file in TIF/TIFF format, output file with or without the txt extension and the language you think the scanned image text is. In our case, it's English, Edgar Allan Poe's The Raven.
Courier font, white background
Almost flawless, expect the exclamation mark was not recognized at the end of the paragraph, but we can live with that, especially after some training. If you're interested, you can download the rendered text file and see for yourself.

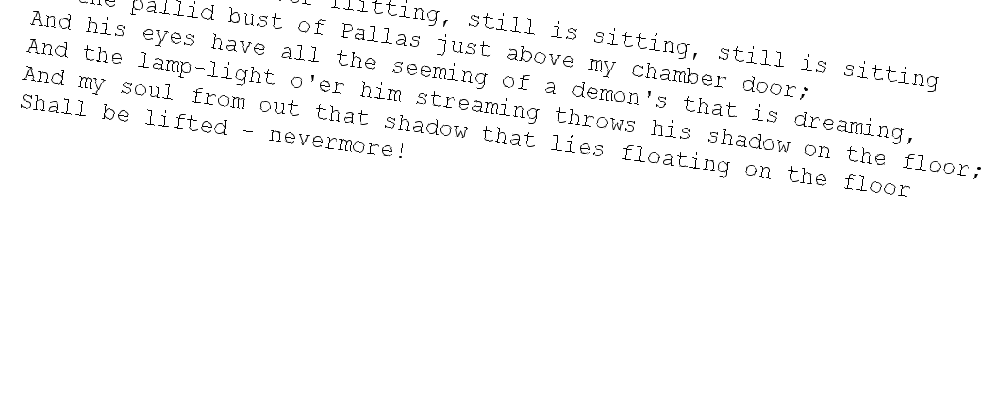
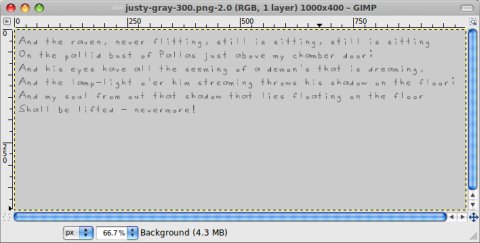
Justy font, gray background
Very bad results, practically useless. Tesseract hardly managed this one. My recommendation is to try to avoid handwritten-like manuscript and/or low-contrast backgrounds.

Courier font, white background, rotated

This was one was meant to be tricky, but the program handled it well, except it replaced several lowercase o with funky characters, like the zero numeral and the copyright sign, but again, no matter. Fairly well done, including the truncated words in the upper left corner. You can download the text file and marvel.

Summary
Tesseract is fast and useful, although it's petulant. You must have your files created in TIF/TIFF format and indexed at 256 colors. Furthermore, for best results, avoid wavy fonts, if you can, and try to aim for high-contrast backgrounds.
More reading
A few more worthy articles on this topic:
Review of Linux OCR software
How to scan and OCR like a pro with open-source tools
Conclusion
And so it ends, this article. You have now learned how to use OCR software in Linux. Tesseract is rather useful and it works well. It's not perfect, though. Low-contrast images with a wavy font are a trouble to read and interpret, but perhaps training will help. You must also do quite a bit of prework, namely convert your files, which is not simple if you are not familiar with image processing. Hopefully, you've learned a valuable lesson that will help you get your analog data transformed into digital text.
There are many other OCR programs, which I've not tested. Perhaps, a sequel? If you have suggestions, feel free to send them. For the time being, I'm really fond of Tesseract. While not a wonder-maker, it's a very decent program,with good speed and quality and just a slightly irksome setup. Dedoimedo declares 8/10. There you go.
P.S. The teaser and index teaser images adopted from a public domain image.
Cheers.