Updated: January 24, 2024
A few day ago, I wrote an article on how to install and configure Maxwell Render in Linux, both the native version and the SketchUp plugin using SketchUp Make 2017 via WINE. Furthermore, I showed you a few other tricks, like desktop HD/UHD scaling and similar. Overall, 'twas a good, fruitful experience.
What I didn't really discuss is how to make Maxwell Render cooperate in the most effective way with your hardware. In particular, if you happen to have a system with hybrid graphics, i.e., an integrated card and a discrete card, you may want to offload the more GPU-intense tasks like rendering to the more powerful unit but keep the simple, desktop stuff in the hands of the less hungry integrated card. I had a chance to look at this "problem" in more detail recently, and decided to write a mini guide that should help you optimize your setup. So there ain't any surprises or disappointments, we're talking about AMD/Intel integrated graphics and Nvidia discrete card. Commence to start.

Windows, pin program to (powerful) GPU
In most cases, if you have a machine with two cards, one integrated and one discrete, by default, your system will be configured to use the integrated one most if not all of the time, purely for power efficiency. When you launch a more demanding task, the operating system can - and should - switch to the more capable unit. This is the case with Steam games, for instance. You can override the defaults, and always force a program to run with this or that device.
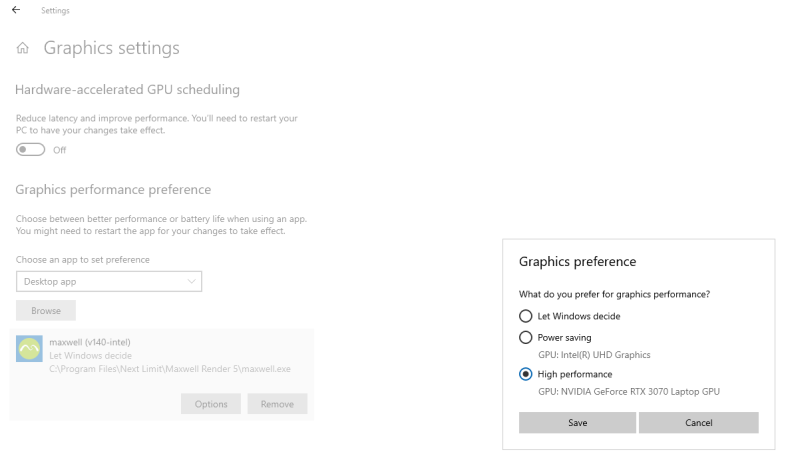
When testing Maxwell Render, I noticed, on a laptop that has a hybrid graphics card setup - Intel + Nvidia, that the application was only using the Intel one (it was preselected as the default for some reason, most likely during the installation process), resulting in relatively low benchmark numbers. Let's change that.
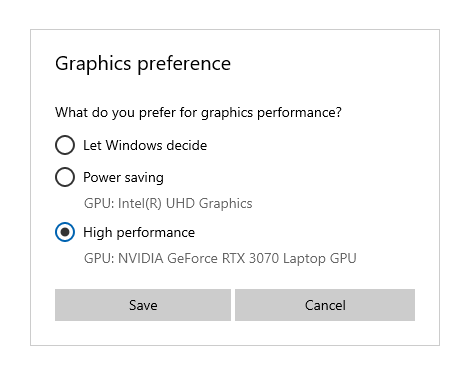
Go to Settings > Graphics settings. Selected Desktop app from the drop down menu, and then browse for the Maxwell executable. Add it, then select High performance option in the popup. Save, restart program, done.
Linux, hybrid graphics
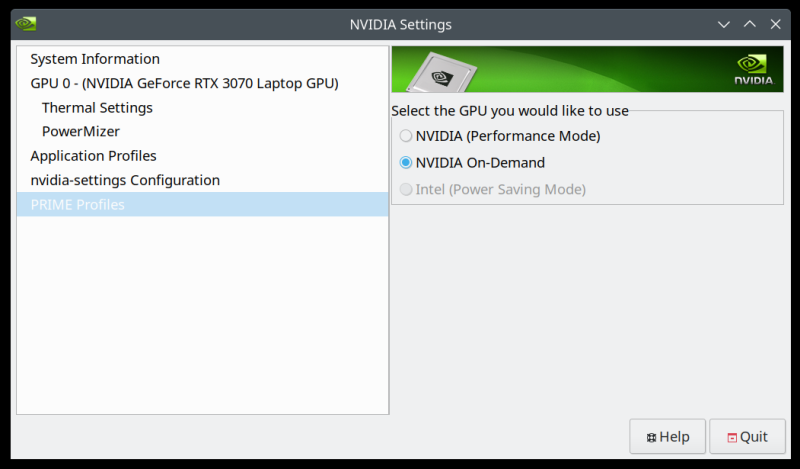
Similarly, you may want to do the same thing on a Linux machine. In my case, on my Slimbook Titan, which has an AMD integrated graphics card and an Nvidia RTX 3070 discrete card, I had to make some tiny changes to get everything in order. Namely, configure the system correctly.
First, you need to tell your system to use both cards. You can do this with the PRIME command. You can configure the system to use the more powerful card on demand (or set it to always on, which usually results in a much higher power consumption, and not what we want here anyway). Your choice.
Most of the time, the integrated card is good for most workloads, like browsing or media, while you need the beefier device only for serious stuff, like games or rendering. Indeed, I configured my Nvidia card to use the on-demand profile. By and large, this should be enough. The system ought to intelligently switch as needed. However, you can override the defaults and set specific programs to use the Nvidia card at all times. In my case, that would be primarily Steam and Maxwell Render (and SketchUp).
With an Nvidia discrete card, thus, the Maxwell Render configuration is (or any program for that matter):
__NV_PRIME_RENDER_OFFLOAD=1 __GLX_VENDOR_LIBRARY_NAME=nvidia [path to binary]
Replace [path to binary] with wherever you keep Maxwell Studio. More specifically, in my case, 'twas:
__NV_PRIME_RENDER_OFFLOAD=1 __GLX_VENDOR_LIBRARY_NAME=nvidia /home/dedoimedo/Applications/Maxwell-Render/studio
Linux, WINE software
You can do the same for WINE applications:
__NV_PRIME_RENDER_OFFLOAD=1 __GLX_VENDOR_LIBRARY_NAME=nvidia wine [program name or path to exe]
Or you can actually change the application launcher path:
__NV_PRIME_RENDER_OFFLOAD=1 __GLX_VENDOR_LIBRARY_NAME=nvidia WINEPREFIX="/home/[your username]/.wine" wine C:\\ProgramData\\Microsoft\\Windows\\Start\ Menu\\Programs\\Maxwell\ Render\ 5\\Maxwell\ Render.lnk
And then check with nvidia-smi (if your discrete card is by Nvidia, duh):
+---------------------------------------------------------------------------+
|
Processes:
|
| GPU GI CI
PID Type Process name
GPU Memory |
| ID
ID Usage
|
|===========================================================================|
| 0 N/A N/A
1440 G /usr/lib/xorg/Xorg
288MiB |
| 0 N/A N/A
10391 G ...ketchUp 2017\SketchUp.exe 4MiB
|
| 0 N/A N/A
17019 G ...well Render 5\maxwell.exe
41MiB |
+---------------------------------------------------------------------------+
However, as I noted in my article on setting up Maxwell Render through WINE, I didn't have the GPU rendering option available for Maxwell Render when I launched the program through SketchUp, either in Windows or Linux. But the option was there if I started the Maxwell Studio directly both the native and the through-WINE version - this is not strictly related to running the program pinned to the discrete graphics card, but it is something to remember and be aware of. Another thing, the quick-preview Fire feature ONLY works with CPU, regardless of the platform or method of invocation.
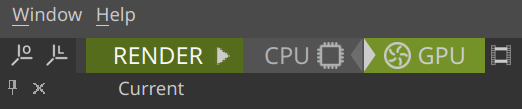
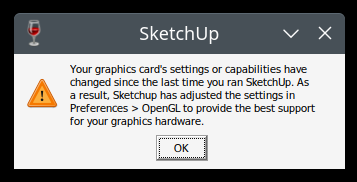
Regarding the no-GPU render for the SketchUp invoked renders, this may be a feature or a bug, or something I missed in the documentation, so please be aware of that, and feel free to send me an email with corrections or clarifications. Note, SketchUp itself did correctly pick up the Nvidia card and even self-adjusted the graphics settings accordingly:

Results, good
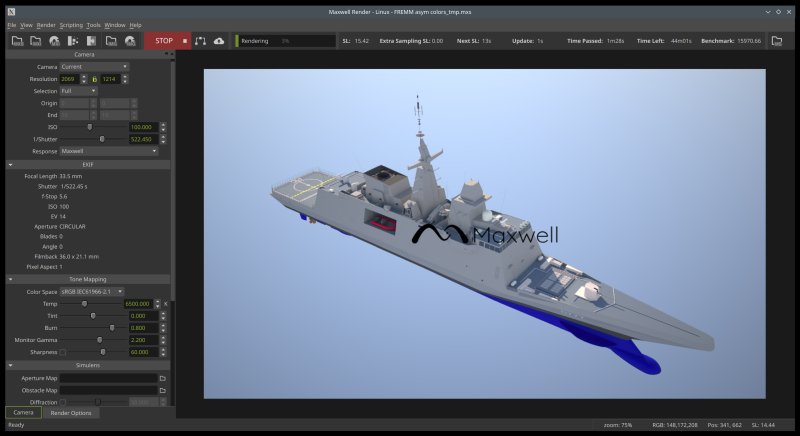
SketchUp invocation aside, as this seems to affect both Windows and Linux builds, Maxwell Studio was now behaving correctly. Specifically, in Windows, with the program set to use the high-performance cards, it was utilizing the right device. In Linux, there was no issue, as the system correctly switched to the Nvidia card when needed, every time (even without the tweak). Therefore, the command change was not necessary, but adding it does not hurt in any way.
Conclusion
Hopefully, this article should help you get the maximum from your powerful graphics card(s), shortening the rendering time by a factor of 8-10 or more. I noticed, on average, that my RTX 3070 GPU outperforms the Ryzen 9 CPU by roughly an order of magnitude. I observed similar results on a friend's laptop with the same card and a 12th generation i7 processor. That means you can make your work much faster, or at the very least, quickly figure out which scenes, lights or materials don't work as well as you expect.
That does not mean the CPUs are slow. With tons of cores, they sure can crank out impressive render images quite speedily. Even so, if you have a device with an expensive card, use it. After all, it's there for a reason. Anyway, I should go back to my 3D stuff and have some more fun. You take care now, and may your renders be fast. See you.
Cheers.