Updated: February 15, 2019
Long time ago, I wrote a tutorial showing you how to shrink and expand VirtualBox hard disks. Back in the day, shrinking was easy, but growing disks required imaging. How the tables have turned. Sort of. Starting with VirtualBox 4.X, this virtualization product now allows you to grow disks as well.
Indeed, I had a virtual machine running low on space, so I thought, let's give it a try. The command succeeded, but my disk wasn't growing. I then realized I was using snapshots, and this is something that I've highlighted even in the original guide from ten years ago. Well, this much needed and updated tutorial will show you how to safely and elegantly expand disks even if you do have machine snapshots. After me.

Modifyhd (modifymedium)
Indeed, the one big change in VirtualBox 4.X onwards is the presence of a native resize command. It does require the use of native VirtualBox hard disk formats, and it will only work with dynamically resized volumes, but it still gives us more flexibility than we ever had before. Anyway, the command looks as follows:
sudo VBoxManage modifyhd "Ubuntu 18.10.vdi" --resize 16000
0%...10%...20%...30%...40%...50%...60%...70%...80%...90%...100%
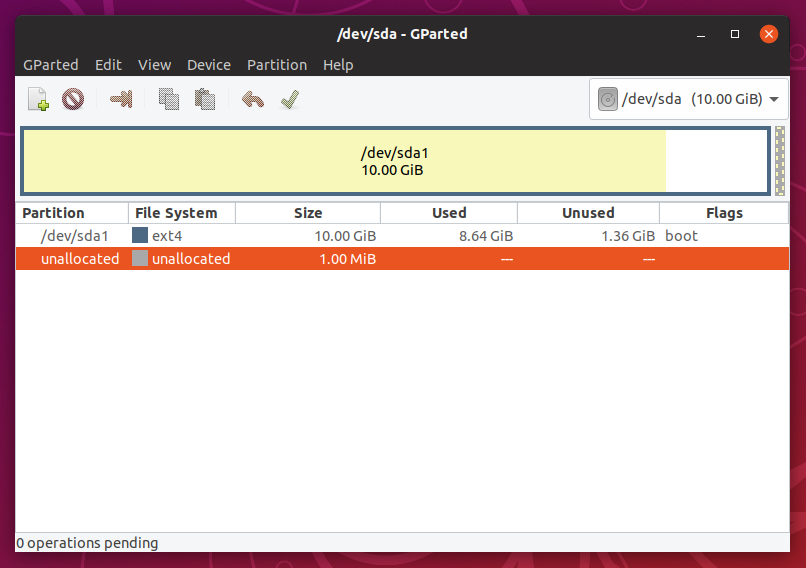
I ran this command and then booted into the virtual machine. It was unchanged at 10 GB. I then booted into the live session, and GParted showed the original size, with no free, unallocated space. Reading online through the official documentation and forum threads, I found out that snapshots interfere with resizing. Now you can delete snapshots - merge everything into a single, current state - or better yet, you can keep the snapshots and expand your testing. With a tiny catch. Let's take a look at the second scenario.
Clone virtual machine & collapse snapshots
So what we need to do is as follows: we will clone our machine, collapse all the snapshots into a single image, and then we will repeat the resize operation. First, choose a name for the new clone and decide whether you want to reinitialize the addresses of network adapters. Second, choose the Full clone option. Third, most importantly, select Current machine state - this will use only the latest available snapshots and merge all previous snapshot data into this one. You will effectively have a machine without 'history' and no snapshots. After that, let the cloning process complete. You will retain the old machine with its snapshots and have a new identical copy that only reflects the last checkpoint. That's the tiny catch. Sort of.


Boot into live session & resize disk
Indeed, now you can check and see whether the virtual machine settings reflect the size change. Previously, the VM disk had a 10 GB size, and it would not change if I ran the modifyhd command. Now, it was showing, and you can check this with a partition manager like the awesome little GParted. But we do need to expand the system root partition.


Now, as I've shown you in the GParted tutorial, we simply need to increase the size of the root partition. You should do this with the root partition unmounted (hence live session). You can also do attempt to this with the partition mounted, but this is not advisable, as you may lose data. Of course, as with any disk manipulation operation, you should have a full backup, and maybe even a system image in case of any complications.
And we're done. We now have a virtual machine with a bigger disk, and the space problems that we may have are gone. Of course, this is not trivial, and there will be many cases where you cannot use either cloning or resizing, but overall, we have a much more streamlined procedure than a decade back.
Conclusion
I hope you find this guide useful. Typically, people will run out of space rather than have too much of it, which is why being able to resize virtual machines, often created with modest settings that do not take into account sufficient future growth, is an important thing. Even more so if this can be done quickly and without too many interim steps.
VirtualBox 4.X onwards let you do this with relatively little fuss. We learned about modifyhd, about cloning and what it means for any snapshots that you may have, and we revisited the old guide on partition management with GParted. Some things haven't really changed, and in essence, cloning is like imaging of yore, but at least we're doing it natively inside VirtualBox, and this is rather useful. So there you go. Take care.
Cheers.