Updated: June 13, 2011
All right. We have learned just a few weeks ago how to use VirtualDub filters to resize videos. Apart from the purely aesthetic need and maybe a desire to make your output media smaller, resizing videos might not seem that important. But what happens if you have a very special need, like say creating bullet-time slow-motion videos, and the software that just does that requires certain formats and sizes?
No worries, we've overcome that obstacle in the last tutorial. And today, I will show you how to create slow motion videos. There's VirtualDub. And we'll get to know another handsome program called AviSynth. This program is a powerful utility for video post-production. It has no frontend, which means you will have to settle down for command-line and scripts. Oooh, sounds scary, but worry not, I'll make it simple.

AviSynth, installation, preparation, configuration
Before we start using VirtualDub, we need to configure AviSynth. Download and install, fairly simple. But we also need an extra plugin called mvtools that is not available with the basic package. Once this is done, you are ready to use AviSynth.
Using AviSynth
No frontend (GUI), no fancy or easy way of getting thins done. Still, you need not be afraid of the command line. Open a text editor and start writing commands - or find ready scripts on the Web and copy them over.I am NO expert, but I can read code and google my way around.
I found the slow-motion script over at Nerds Central and adapted it to my own use. The author explains in detail what the script does, so there's little point going through the commands and explaining them one by one. Just remember, AviSynth is a de-facto programming language with its own syntax. If you know one, you know them all.
Here's my work, basically identical to the above example:
LoadPlugin("Path to mvtools.dll")
source=AVISource("Path to source.avi",false)
oSource=source
source=ConvertToYV12(source)
source=AssumeFPS(source,25)
backward_vec=source.MVAnalyse(isb=true,truemotion=true,pel=2,idx=1)
forward_vec=source.MVAnalyse(isb=false,truemotion=true,pel=2,idx=1)
cropped=source.crop(4,4,-4,-4) # by half of block size 8
backward_vec2=cropped.MVAnalyse(isb=true,truemotion=true,pel=2,idx=2)
forward_vec2=cropped.MVAnalyse(isb=false,truemotion=true,pel=2,idx=2)
fSource=source.MVFlowFps2(backward_vec,forward_vec,
backward_vec2,forward_vec2,num=250,idx=1,idx2=2)
fSource=AssumeFPS(fSource,25)
return fSource
However, a few pointers, which demand your attention:
You will need to point to your mvtools.dll and the source file correctly. Second, there's the instruction to convert source to YV12 format. You can edit this line if your file is already in the right format - or use VirtualDub.
source=ConvertToYV12(source)
How do you know what this YV12 thingie is? Or why do you need it? The answer is, you do not need really need it, but it's good for processing video. In geeky terms that should impress you, YV12 is a planar format, meaning that for each image, the luma data for all pixels is stored consecutively, followed by the chroma data, which is ideal for image processing techniques. Now, forget this last sentence.
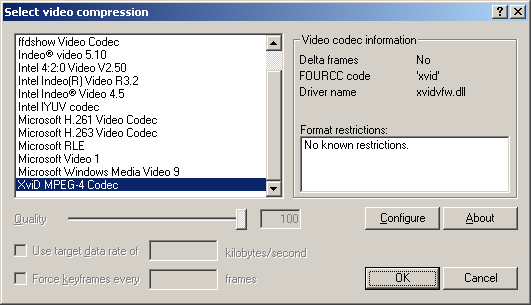
Anyhow, for more information what formats support YV12, AviSynth FAQ is your friend. In general terms, MPEG-4 with XviD should work just fine.

If you get this one wrong for some reason, you'll get this error when you try to load the script in VirtualDub - as to how you do that exactly, we will see in a short while:

Next, AssumeFPS for the source. Setting the right framerate also helps create the best output, without guessing. This will help you produce output video as you expect, without having to go through several iterations of tweaking the framerate up and down.
Cropping
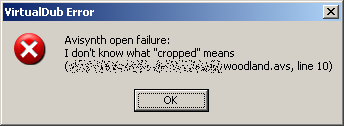
This is a tricky one. If you happen to have a video file with a width that is not divisible by four, you'll get an error from VirtualDub while trying to load the script, complaining about this arithmetic thingie:

You may decided to comment out the cropped parameter line in your script, which might work, but make sure the logic of your script is changed, so you do not end up with any undefined variables:

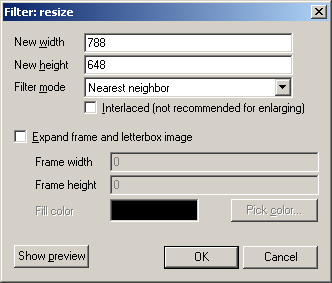
But better yet, resize your video in VirtualDub, using the resize filter! Which is exactly what we have learned the last time! Now you know why we did it.


The MVFlowFPS2 parameter will determine how many frames your slowed-down video will have, however, the actual slowdown depends on the output framerate. Indeed, finally, pay attention to the output AssumeFPS, as this will ultimately determine how fast or slow your video will be, including its length and size. You can play with this parameter as much as you like, to see what gives the best result.
fSource=AssumeFPS(fSource,25)
Load the script in VirtualDub
Indeed, none of the errors shown above will, eh, show until you save your text file as a script with an .avs extension and open it in VirtualDub, as you would open any other file. If you make no errors, the video will load, with a certain factor of frames insert. The above example gives you x10 factor, but you can work with any number of FPS to change it, to say x2, x5, etc.

End result
The final cuts of my work with AviSynth are available on Youtube. Link one and two. So please hop by and check the quality of my work. You may also be interested in the interior design gallery that features these videos.

You will notice there's some blurring at the edges of the videos, because of interpolation between frames. The original recording was a collection of single camera frames, resampled to 25 frames per second, then slowed down ten times. So you have the software filling in the gaps approx. 250 times in between frames, which is not a simple deal. You'll get much better results with motion videos, which already feature some blurring, plus it is expected in these cases.
But I guess it's a decent work. An you know how to do it, now.
Conclusion
There we go, another multimedia tutorial sliced and diced. By now, you're a video sous-chef. On a serious note, VirtualDub is a very powerful and highly extensible tool for working with media files, including all kinds of filters. Combined with AviSynth, you can go for impressive Matrix, or if you prefer John Woo, effects in your home-made videos, besting your neighbors and work colleagues.
AviSynth is not the simplest utility, because it lacks GUI, but it works well. Just remember the basic layered approach. Use VirtualDub for first-level changes and fixes and additional processing and transcoding. Next, use available filters to achieve extra effects. Lastly, use third-party modules for final touches. Well, that would be all. Have fun.
Cheers.