Updated: August 20, 2025
Wait, what. Yes, KDE is developing its own Linux distro called, well, KDE Linux. The project is still in extremely early phases, hence no big public announcement. But it is an interesting idea, and you might be tempted to test it. But, would you risk installing such an alpha-quality system on your physical hardware? That's what virtualization is for.
The only problem is, the KDE Linux installation instructions don't mention anything of this kind. The requirements call for a UEFI-based system, which means, it won't support old, legacy machines. Okay. Makes sense for a tool being developed in 2025. Another hardware restriction is that you won't be able to use Nvidia cards older than GTX 1650. This feels too limiting. It will also be Wayland only, most likely. Hm. But let's not get ahead of ourselves. Early work. Indeed, we're here so I can show you how you can set up this distro in a virtual machine, safely. This will allow you to test the system without sacrificing precious hardware or risking major bugs. Let's commence.
Raw disk usage
In my view, the instructions are quite clunky - consider this feedback for the future. By offering the test image as a raw file rather than ISO, one must go through lots of extra steps to get things working. To wit, here's everything that didn't work for me:
- I tried to "burn" the raw image to a USB drive with Etcher. Unbootable results.
- I looked for ISO Image Writer, mentioned in the instructions, but it's not in the repos (22.04).
- I did manage to find the latest AppImage on KDE's CDN, but when I ran it, it threw the following error, plus it never showed the plugged-in USB drive, no matter what:
./isoimagewriter-master-646-linux-gcc-x86_64.AppImage
Could not read drives from UDisks: "org.freedesktop.DBus.Error.Disconnected" "Not connected to
D-Bus server"
- I was able to create a successful USB drive image with the good ole dd command.
Now, we need to make use of this USB drive alongside virtualization. Tool of choice: VirtualBox. Not only that, I've already written a tutorial that shows how to create and mount raw devices and use them as bootable drives inside virtual machines. Basically, in the KDE Linux VM folder:
sudo VBoxManage createmedium disk --filename=./Rdisk.vmdk --format=VMDK --variant=RawDisk --property RawDrive=/dev/sdb
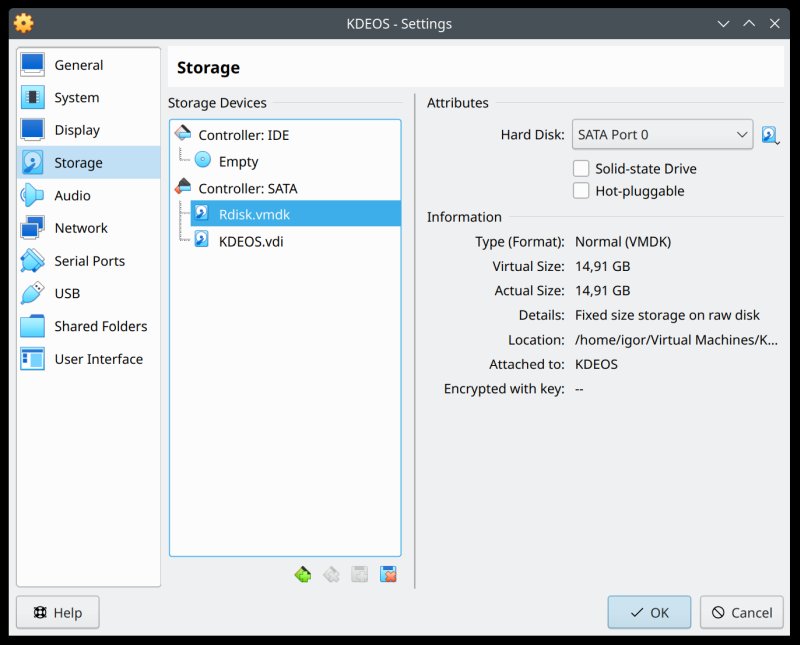
Then, add this new vmdk to the virtual machine. Settings > Storage, under Controller: SATA, click the add disk button, and find your raw disk vmdk file. I assume you have read my tutorial and sorted all the possible snags mentioned in that article, right?
Change boot order
Since we have two disks - KDE Linux plus the USB drive, to be on the safe side, let's make sure that the USB drive is set as the first boot device. Yes, VirtualBox ought to automatically skip the unbootable first disk, and go to the second one, but let's avoid any doubt. Settings > Storage, under Controller: SATA, select Rdisk.vmdk, then change its SATA port. Initially, the vdi file was set to Port 0, the vmdk file was set to Port 1. I swapped the order.
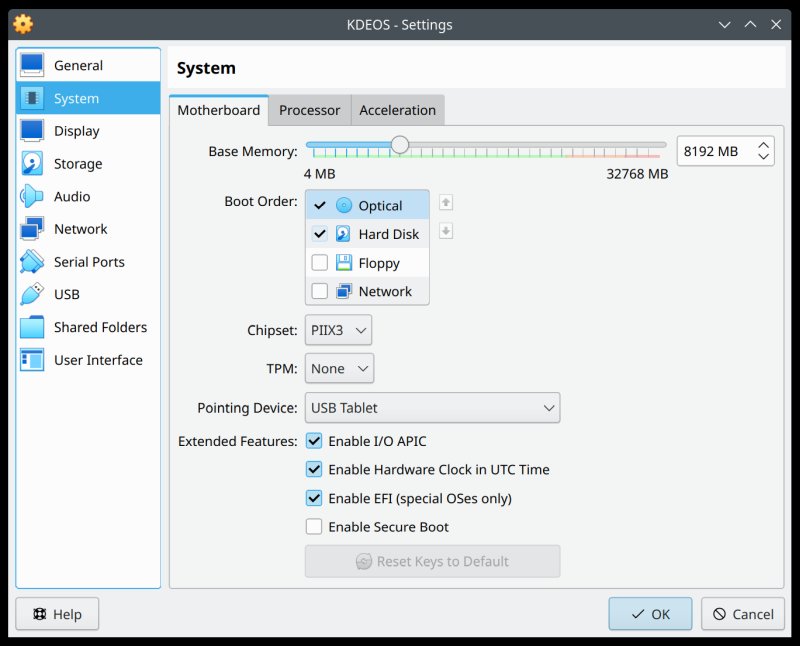
Enable EFI boot
The last step is to make sure your VM is EFI-capable. Again, open the Settings window for the KDE Linux virtual machine. Under System > Motherboard > Extended Features (at the bottom of the page), tick the box that reads: Enable EFI (special OSes only). Click OK.
Test your KDE Linux
And now, you can boot the virtual machine. For me, KDE Linux launched fine. But, within about a minute, the desktop would go blank. The Welcome wizard stayed, though, and I could click through. This error was fully repeatable, so obviously, the distro still possibly isn't ready for serious testing. It is also possible this is due to the use of virtualization, but I doubt it. You could also try with 3D acceleration enabled, to see what gives.
Anyway, you have nothing to lose. If it doesn't work, you can always go for physical hardware later on.
Conclusion
Here you go. This guide should be handy. Even if you don't end up testing or using KDE Linux, you will have learned a bit more about the use of raw devices with your virtual machines, EFI boot and such. A useful couple of tips no matter what. But please, be extra careful. You can easily damage your systems or even lose data if you mount the wrong device.
KDE Linux could be an interesting endeavor. I'm not sure how it aligns with KDE neon or several dozen Plasma-based distros out there. Nor with the bunch of other atomic distros. Nor with the fact the Linux desktop severely lacks in many critical areas, and another distro ain't gonna fix those. Anyway, for now, it seems like an early experiment. If anything, I would make the instructions clearer and simpler to follow/execute. At the very least, I would go for ISO images, because they offer a broader range of options. After all, if it's very hard for people to test a tool, well, then, they won't test it. As for an actual review of this distro, I guess I'll have to wait for it to mature a bit more before taking it for a spin. Take care.
Cheers.