Updated: September 27, 2024
Just a few weeks ago, we talked about Upscayl, a truly excellent AI-powered tool that can upscale your images. Before you say ZOMG AI, wait. This is a fully offline, open-source, cross-platform utility, and it doth not phone home or anything like that. Your work stays local. But the quality of upscaling will vary from image to image, as I've outlined in my review.
Now, what if you cannot use this program, for whatever reason? What if you have an unsupported integrated graphics card (as is typical on many a laptop), but you still want to try to upscale your old photos, reduce the blur, and make things better? In today's tutorial, I will tell you how well I fared using ImageMagick on the command-line, plus some wizardry with GIMP. Let's do 4K stuff the old-school way.

How to upscale images with ImageMagick (convert)
First, you will need to install (if not already installed) the ImageMagick package in your Linux distribution of choice. My work was all done using Kubuntu 22.04, so it's Ubuntu commands and such.
sudo apt install imagemagick
Once the program is installed, you can use the convert tool. Here's a rather long and complicated command:
convert [IMAGE] \
-alpha on \
-virtual-pixel transparent \
-filter Triangle \
+distort Affine "0,0 0,0 %w,0 [WIDTH],0 0,%h 0,[HEIGHT]" \
-alpha off \
-crop [WIDTH]x[HEIGHT]+0+0 [OUTPUT IMAGE]
What do we have here? Well, take a look at what convert can do:
- -alpha on activates the transparency channel - you won't lose any transparency during the conversion.
- -virtual-pixel transparent - defines access method for pixels outside the boundaries of the image, so you don't end up with any weird artifacts, especially along the image borders.
- -filter Triangle defines the resizing filter. Many exist, and you can try them, like Point, Gaussian, Cubic, etc.
- We could use additional options, like various noise-reducing filters, blurring filters, and more. But I think those are not necessary right now, as our main purpose is to try to enlarge our images without making too many changes, and definitely not losing any quality, so to speak.
- +distort defines the type of image distortion during resizing. Affine defines the drawing transformation matrix for combined rotating and scaling. The numbers listed in the quotation marks are the matrix values. In essence, we only want to go from the original width and height, namely %w and %h to new WIDTH and HEIGHT.
- We turn the transparency off.
- We crop the resized image to the new dimensions.
This isn't a simple command. It took me hours and hours of reading and trawling around the forums to get the right commands. I don't claim any higher wisdom here. In fact, when you use GIMP, a lot of the tools do similar things in the background.
A practical example of a convert command would look like this:
convert input.png -alpha on -virtual-pixel transparent -filter Triangle +distort Affine '0,0 0,0 %w,0 3834,0 0,%h 0,3582' -alpha off -crop 3834x3582+0+0 output.png
Faster work: BASH script
If you want to make your work easier, you could put this command into a script, and substitute actual values for input parameters, so you have more flexibility working with files of different sizes. Here's a very rudimentary BASH script that will take an input file, plus the original width and height values (in pixels). The script is written to enlarge files by a factor of 4 (x4), but this could also be a dynamic (input) parameter, if you like.
The reason my script looks a bit ugly is that the convert command doesn't really like substitution, and so I had to "fake" it by concatenating multiple strings into a command. I'm sure there are more elegant ways, including doing arithmetics on the fly, but the purpose of this script isn't BASH wizardry, it's to run convert and get the job done. Here, $1 means file name, $2 is the original width, $3 is the original height. The output name is hardcoded, but it's your choice.
#!/bin/bash
WIDTH=$(($2*4))
HEIGHT=$(($3*4))
AFF="0,0 0,0 %w,0 $WIDTH,0 0,%h 0,$HEIGHT"
CROPVAL1="$WIDTH"
CROPVAL2="x$HEIGHT+0+0"
CROPVALCAT=$CROPVAL1$CROPVAL2
convert "$1" -alpha on -virtual-pixel transparent -filter Triangle +distort Affine "$AFF" -alpha
off -crop $CROPVALCAT output.jpg
exit 0
The usage would then be, for instance:
./my-convert-script.sh filename.jpg 1440 1080
Now, the errors ...
If you run this script, you may get various ImageMagick errors - it could complain about cache resources or memory limit. Indeed, if you try to make your files too big, convert will hit the program policy limits.
convert-im6.q16: width or height exceeds limit `file.jpg' @ error/cache.c/OpenPixelCache/3909.
convert-im6.q16: cache resources exhausted `file.jpg' @ error/cache.c/OpenPixelCache/4095.
To get past this nuisance, open (as sudo) /etc/ImageMagick-6/policy.xml. Then, edit memory values, width or height as you see fit. In my example, I raised the memory limit from 256MiB to 2048MiB, and later even higher, and also changed both width and height values from 16KP to 64KP. Be sensible, though. You may run out of memory on your system, if you exaggerate.
<policymap>
<!-- <policy domain="resource" name="temporary-path" value="/tmp"/> -->
<policy domain="resource" name="memory" value="2048MiB"/>
<policy domain="resource" name="map" value="512MiB"/>
<policy domain="resource" name="width" value="64KP"/>
<policy domain="resource" name="height" value="64KP"/>
<!-- <policy domain="resource" name="list-length" value="128"/> -->
<policy domain="resource" name="area" value="128MP"/>
<policy domain="resource" name="disk" value="1GiB"/>
...
Early findings with convert ...
My results were quite interesting:
- Convert is quite fast, roughly 10x more than Upscayl, because it doesn't really do any great thinking.
- For hi-res, blurred images, like my examples 2 and 3 (human and ski chalet) used with Upscayl, convert did about as well as the AI tool, but not nearly as good as my example 1 (low-res, small-size cat image).
All right, so the command above resized our images a-la Upscayl. Some interpolation based on the algorithm specified. That's what we wanted. But you could also try to reduce noise, blur or sharpen your images, and then some. Cool.
Thus, separately, and in parallel, I tried using GIMP for some additional image processing, and also tried the equivalent convert commands (so I could script them later on). Most notably, I wanted to try the blur and unsharpen (mask) functions, to see if they could help with my manual conversion, before or after the resizing.
Before we move on to GIMP, here's a very rudimentary example of how you can apply additional processing to images with convert. For instance, to sharpen a photo using a 4px radius, you would run:
convert input.jpg -sharpen 0x4.0 output.jpg
Or perhaps, use an adaptive sharpening function with a 3px radius:
convert input.png -adaptive-sharpen 0x3.0 output.png
Findings using GIMP (and equivalent convert commands)
Before we move on, here are my assumptions:
- Upscayl works well under certain conditions (see the FAQ - and my review).
- I used GIMP for blurry, grainy images that Upscayl could not heal properly, so to speak.
The following happened:
- Manual sharpening and subsequent blur of source images through GIMP yielded a significantly improved baseline for subsequent rescaling - with convert or through GIMP.
- Manual noise reduction was useful for grainy images, with similar or better results than the AI tool.
- Doing Upscayl AFTER some manual tweaks greatly helped with (these) wonky photos.
General recipe for manual conversions (convert and/or GIMP)
After some trial and error, here's what I've come up with. The tools, GIMP, convert, and then eventually, optionally, Upscayl. Of course, the actual "sauce" depends on so many factors, but generally, I found the results to be quite favorable.
First a decision on whether to use convert or GIMP:
- If you want to stick with convert and not mess around too much, and you have relatively large images, then just perform a 1-3px unsharpen before running the upscale (x2 or x4).
- If you do not like command-line work, and you want to do more than just a rudimentary sharpening, then the sequence of steps in GIMP is a bit more elaborate. Do note, however, that the convert command as outlined above does better-quality image resize than what you get in GIMP, by default.
Next, a decision regarding the image size:
- If your image is small, don't do any sharpening, blur or noise reduction before upscaling. Your image already has limited information, and any additional processing will remove even more. Run resize or upscale first, then apply additional post-processing functions (see details below).
- If your image is large, scale it down to something like 2000x2000px. The reason is, similar to Upscayl, if your images are already big, hi-res and such, but grainy or blurred, you won't see major improvements. You will save time processing the images, or at the very least, figure out what works for you before making the final set of tweaks.
Next, assuming your images are large but of low quality, I found the following work to help:
- Increase the contrast by 10-15, brightness by 15-20 (especially if dark or varied lighting). The reason is, in most cases, after you do some unsharpening and blurring, the image will be a bit darker. The initial increase in brightness and contrast will help get a similar feel to your original image.
- If the image is blurry, run a noise reduction pass (default).
- Run 1-2 passes with the unsharpen filter (default) - deduct one pass if you used noise reduction first.
- Run 1 pass with the Selective Gaussian filter (default) - you can skip this step potentially if you're happy with the results so far.
Finally, resize the image:
- Resize the image by a factor of x2 or x4.
- You can use convert for this last step (as I've outlined the exact command you need).
- Optional step: Upscayl - we will discuss that shortly. Now, this might not be possible, if you're using convert due to practical usage limitations.
And that's it. You should now have nicer images, and much sharper than before. You ought to get a bit more clarity, bigger size, and (almost) no loss of original information. Here's a little side by side comparison - the original, plus a "massaged" new image - noise reduction, unsharpen twice, selective Gaussian blur once, and a x2 resize.


Optional: subsequent AI upscaling
If you have the ability, try using Upscayl, just to see how it fares. If your computer cannot do it, perhaps ask a friend, so you get a comparison. A general recipe is to take a scaled-down image of your original, the 2500x2500px template we mentioned in the GIMP section, and then work on it.
- Upscale the image using the default settings first.
- Run a second upscaling on the image after applying contrast/brightness, unsharpen and blur, but before running a resize.
- Run a third upscaling on the converted image (x2 or x4 larger), but use the x1 image scale increase factor (same size). In other words, you will have manually resized the image, but you will still try to enhance the detail level with AI algorithms.
- Try all of the conversions with the ULTRASHARP model.
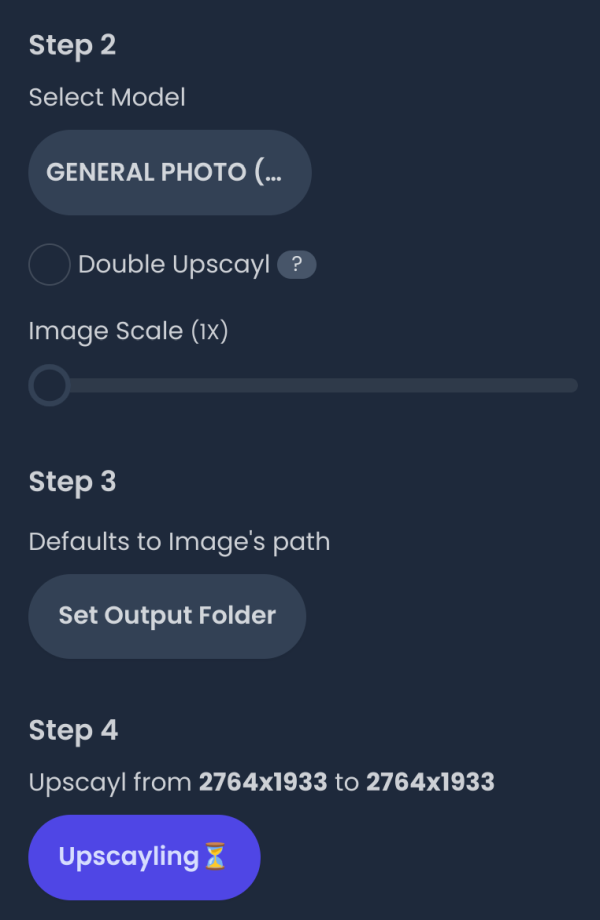
You can keep the image size unchanged if you like (faster, easier to compare).
Check the results. This will give you further "proof" that the manual method is pretty solid. Furthermore, your upscaled images will also look a bit better if you've done some contrast/brightness and sharpening beforehand. Again, don't expect miracles, but you could still end up with nice little improvements to your old catalog of images. And in this regard, every little bit can help.
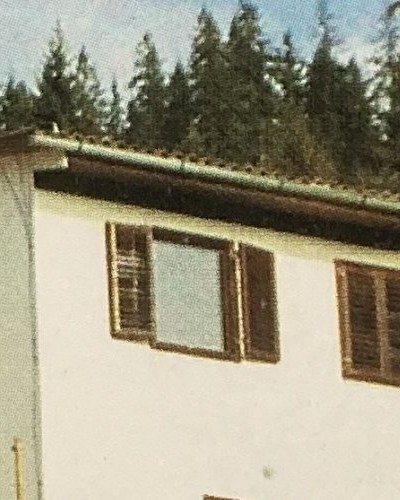
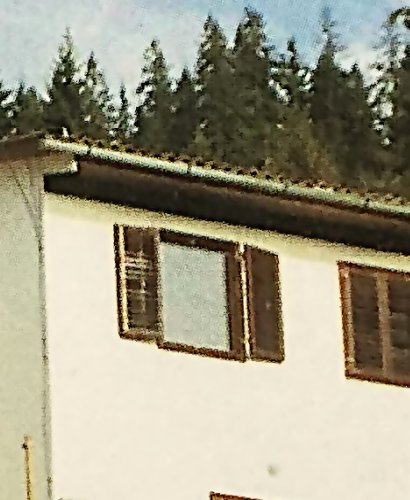
Original vs Upscayl (no other changes done). In some regards, the AI-upscaled work is worse.


Original plus Upscayl after manual unsharpen mask ... AI did much better after noise cleaning and unsharpening.


Upscayl (default) versus Upscayl after some manual pre-processing. The new AI
result is significantly better.
Finally, if you compare the AI work after post-processing and manual work, you will see that Upscayl
did superbly with some help. But without it, the manual resize work on the blurry photo is comparable
to the default results with Upscayl. As I noted in my review, Upscayl works superbly with low-res
photos with low noise, uniform lighting, and moderate detail. It does not work well with hi-res,
blurry, grainy photos where noise exceeds the model fineness and ability to repair and extrapolate
information, as in my example no.3 (see the tool review for more information). But if you combine
some manual work
AND then use Upscayl, you can work around that limitation!
Conclusion
Hopefully, you will find this tutorial useful. Now, the results will vary greatly based on your input files. Some of your photos will remain blurry and grainy no matter what. There's only so much thermodynamic magic we can do with non-existent information. Also remember, what your eye sees is not what the machine does, and it must use algorithms to figure out the "space" between pixels. It has no imagination, only pixels.
In the previous tutorial, we talked about Upscayl. The program is great. But if your system has no discrete GPU, it's not all lost. You can still improve your images manually. It takes more work, you need to be comfortable using nerdy tools, but it's doable. In fact, it's more than doable. You ought to be pleasantly surprised with the outcome. Anyway, that would be all for today. Take care, and see you soon.
Cheers.