Updated: June 14, 2024
Over the past five years or so, I've written about half a dozen articles on how to manage desktop and application scaling in Linux on high-density displays. It all started with my Slimbook Pro2 laptop and its 14-inch display, capable of showing a lovely 1920x1080px grid, too small to properly view at such a small screen. And so I started a tutorial on how to manage scaling in the Plasma desktop, specific tweaks for various applications, and then some.
Since, I've written other guides on this topic, covering snaps, WINE applications, Steam, DOSBox, and whatnot. Because the information is scattered over multiple tutorials, and search engines ain't what they used to be, i.e., not quite as useful and accurate, I thought of making one big compilation that should help you find all of the relevant tweaks and commands, for all your Linux needs, in one place. Let's go.
How to scale the GRUB bootloader menu
Let's start with this one - the first thing you will see when you boot your system. As I outlined in my tutorial, you will need to edit the /etc/default/grub file, and make the following changes:
GRUB_GFXMODE=640x480
GRUB_GFXPAYLOAD=keep
GRUB_TERMINAL=gfxterm
How to scale the Plasma desktop environment
Next, if you're using KDE's beautiful desktop, you can easily scale everything with just one setting. From version 5.20 onwards, the scaling really works well. From version 5.24, it's superb. Before that, you may occasionally encounter an odd visual artifact here and there. Go to Hardware > Display and Monitor > Display Configuration, change the Global scale to whatever you like, and save the settings. Log out and then log back in to apply the new scale for all windows and applications. Please note you will still need to manually adjust the height of the system menu if you don't like the default (and possibly the mouse cursor size).

Plasma subsection: Gnome apps running in the Plasma desktop environment
Optionally, in case the global scaling does not help, for whatever reason, for GTK-2.0 apps, open the ~/.gtkrc file, and edit the font directive gtk-font-name="Something Size". For example, change from 10 to 12. To wit, Noto Sans Regular 12.
include "/usr/share/themes/Breeze/gtk-2.0/gtkrc"
style "user-font"
{
font_name="Noto Sans Regular"
}
widget_class "*" style "user-font"
gtk-font-name="Noto Sans Regular 12"
gtk-theme-name="Breeze"
gtk-icon-theme-name="breeze"
gtk-fallback-icon-theme="gnome"
gtk-toolbar-style=GTK_TOOLBAR_ICONS
gtk-menu-images=1
gtk-button-images=1
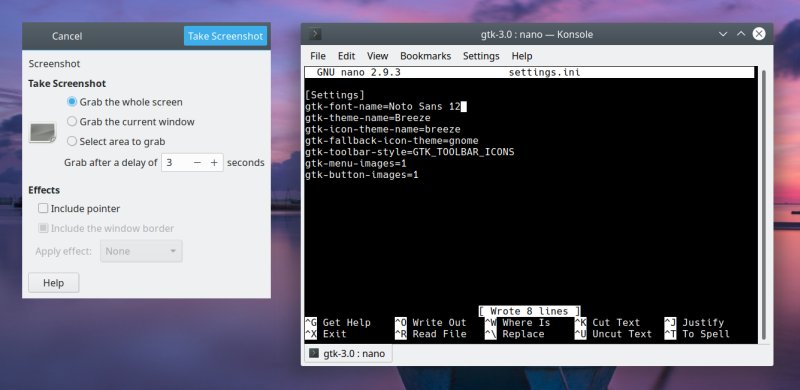
For GTK-3.0 apps, open ~/.config/gtk-3.0/settings.ini and make the same font change like earlier.
[Settings]
gtk-font-name=Noto Sans 12
gtk-theme-name=Breeze
...
Plasma subsection: How to scale the SDDM login screen
You may also want to scale your logic screen - this may or may not be automatically done by your system, and it depends of the Plasma version. Manually, the following trick will work for you. Namely, we need to change the login (SDDM) Xsetup script - only applicable for X11 and not Wayland (of course).
- SDDM scripts are located under: /usr/share/sddm/scripts/.
- The script that controls the graphical component is called Xsetup.
By default, this script may include some information, specific to your graphics driver. What you need to do is add an entry - at the end of the file - that will make SDDM display at a different resolution. Open the Xsetup file in a text editor as sudo or root (back it up first, of course), and add this line:
xrandr --output "device" --mode "mode" --rate "rate"
We will need to replace "mode" and "rate" with actual values. To that end, open a terminal window and run xrandr. This will show you all the supported modes for your monitor.
xrandr
Screen 0: minimum 8 x 8, current 1920 x 1080, maximum 16384 x 16384
eDP-1-1 connected primary 1920x1080+0+0 (normal left inverted right x axis y axis) 344mm x 194mm
3840x2160 48.00 +
3200x1800 59.96 59.94
2880x1620 59.96 59.97
2560x1600 59.99 59.97
2560x1440 59.99 59.99
59.96 59.95
2048x1536 60.00
1920x1440 60.00
1856x1392 60.01
1792x1344 60.01
2048x1152 59.99 59.98
59.90 59.91
1920x1200 59.88 59.95
1920x1080 60.01 59.97
59.96 59.93*
1600x1200 60.00
1680x1050 59.95 59.88
1600x1024 60.17
...
In my example, the device is eDP-1-1. The available resolutions go all the way up to 4K. The selected one is marked with asterisk. And then, you also have the different screen refresh rates in Hz. We know that the 4K resolution makes everything too tiny, so we want something smaller. I decided to go for 1080p, like the desktop itself. In my case, the matching refresh rate was 59.93 Hz. Thus, the xrandr command becomes:
xrandr --output eDP-1-1 --mode 1920x1080 --rate 59.93
Save the file, and reboot your system. Your login screen should look great now.
Plasma subsection: Get rid of white/black lines in Konsole (on a scaled desktop)
If you encounter this bug, then open Konsole > Settings > Edit Profile. Click on Appearance > Miscellaneous. Here, change the line spacing from the default value of 0px to something higher. On a laptop with scaling set to 1.25, I tried with 1px initially and this helped, but not entirely. 2px, still better, but not fully resolved. The 3px spacing fixed it for good.

How to scale the Gnome desktop environment
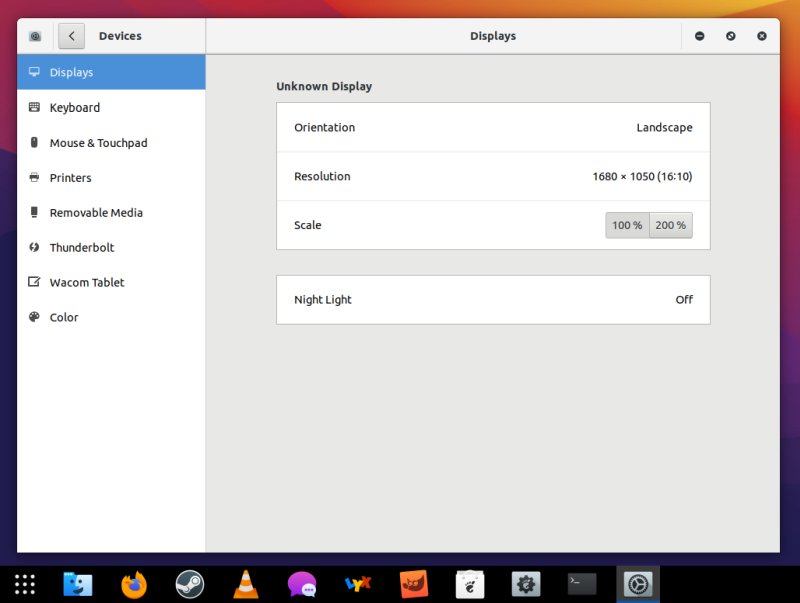
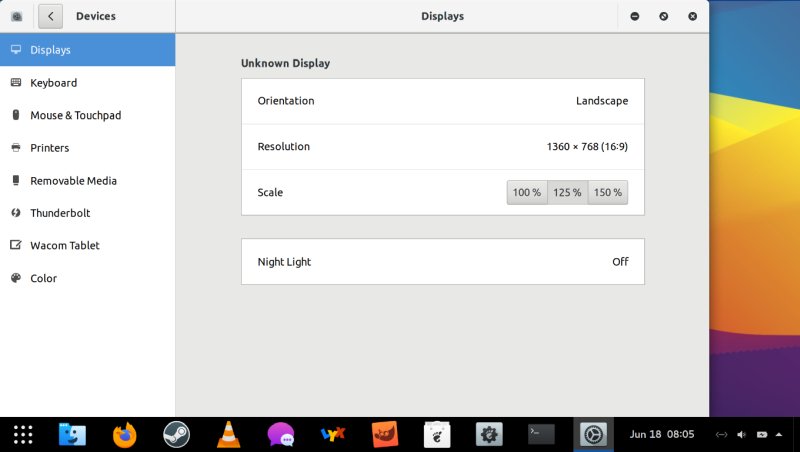
I've covered in this in my namesake guide. For Gnome, there are two aspects - one, global scaling in full integers; two, global fractional scaling that is not enabled in all distributions by default, and may require that you turn an experimental setting on. Go to Settings > Devices > Displays > Scale. Set the value you like. In most cases, 100% will be too small, 200% too large.
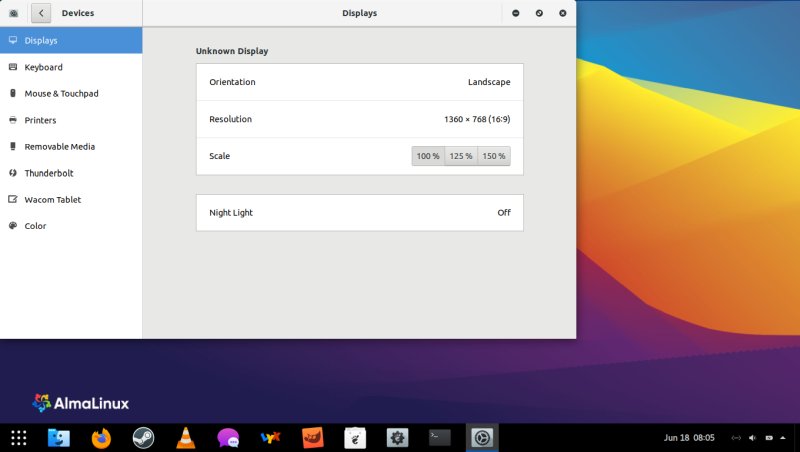
Gnome subsection: Experimental fractional scaling
To turn the experimental option on that will give you fractional scaling (125%, 150%, etc), open a terminal and type (as your user):
gsettings set org.gnome.mutter experimental-features "['scale-monitor-framebuffer']"
Log out of your session, and then log back in. Now, go to the Settings > Devices, the Display section should have fractional values. The scaling changes are immediate.
Gnome+ subsection: Use font scaling as an alternative to fractional scaling
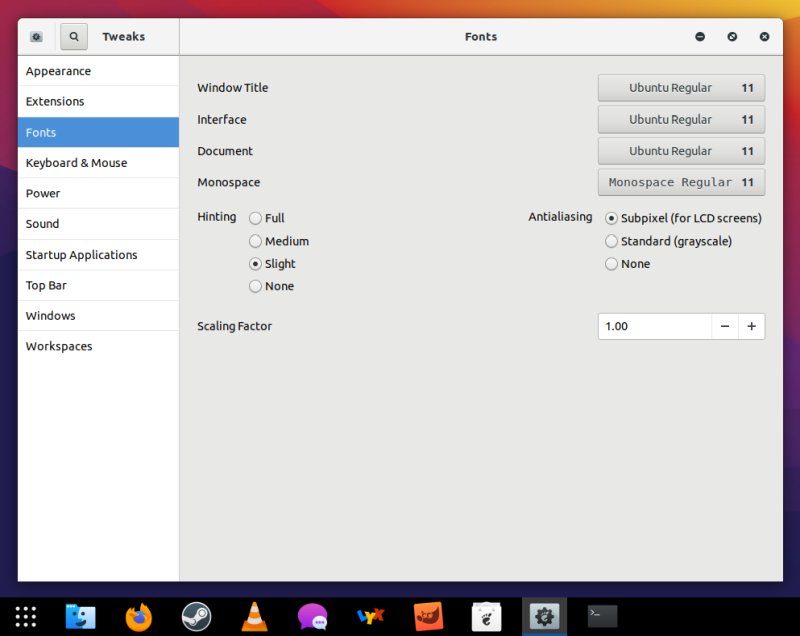
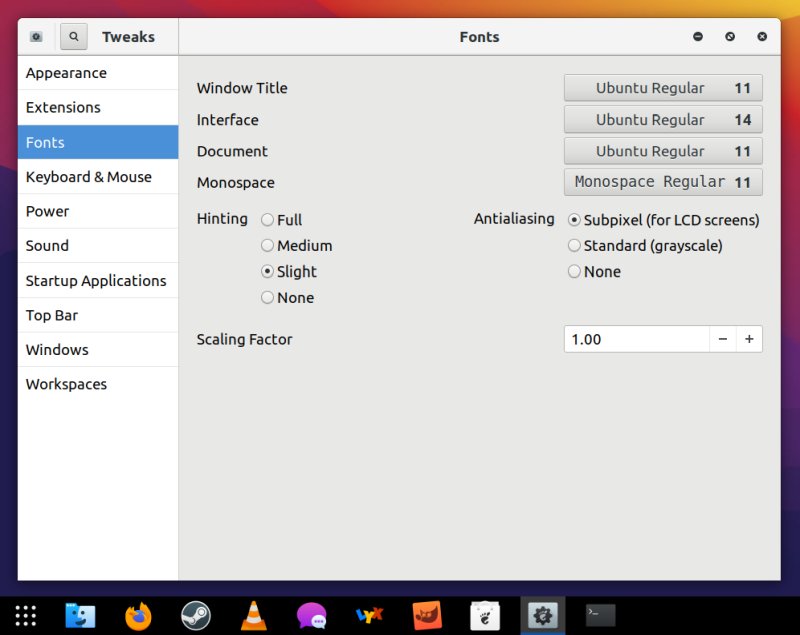
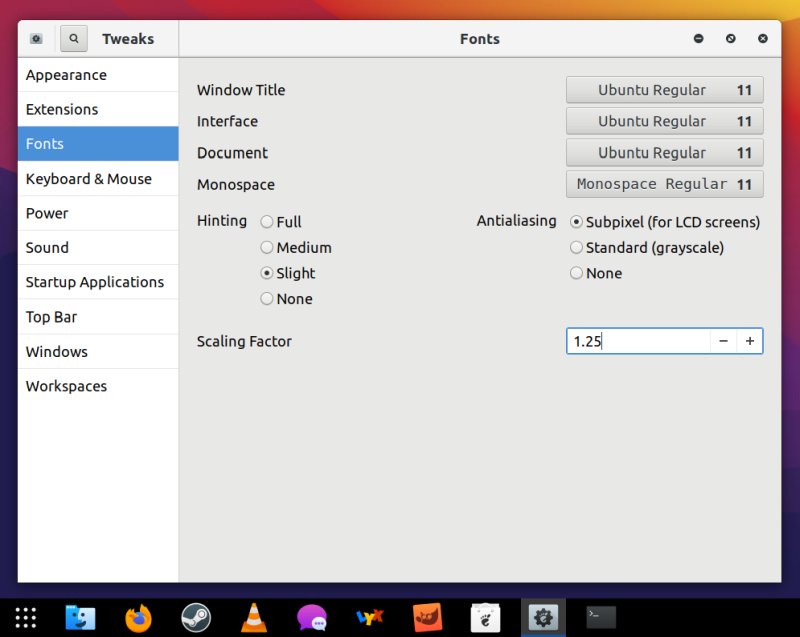
If you cannot or do not want to use fractional scaling, you can use the Font Scaling Factor to achieve somewhat similar results. To that end, you will need to install Gnome Tweaks. By default, most Gnome-default distros do not ship with this utility installed, but it ought to be available in the repos. Grab the tool, launch it, and then go the Fonts category in the sidebar.
Chromium-based browsers
This applies to Chrome, Edge, various other Chromium- and Electron-based browsers and apps. Locate the application desktop file. For instance, for Chrome, we need to edit the google-chrome.desktop file under /usr/share/applications. You need to look for the line that reads Exec=. This is the executable line, which starts the browser with optional flags. We need to change the default value from:
Exec=/usr/bin/google-chrome-stable %U
To:
Exec=/usr/bin/google-chrome-stable --force-device-scale-factor=X.XX %U
Change X to whichever scaling value suits your eyes. Do note that Chrome may (or will) overwrite your settings on every update. Alternatively, you can create a custom application shortcut (on your desktop) that will contain the launch command plus the scale factor flag.
P.S. An alternative flag for some of the Chromium-based browsers can be:
--force-device-factor=X.XX
Firefox (and Thunderbird)
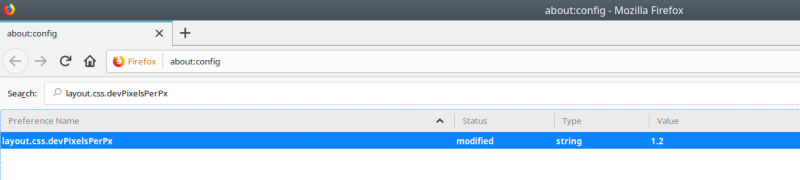
In Firefox, type about:config in the address bar, and then search for: layout.css.devPixelsPerPx. Change this value from -1 (default) to any scaling factor you like, for instance 1.35. The changes are immediate. You can make additional tweaks through the userChrome.css overrides, as I've outlined in my Plasma scaling desktop tutorial linked above.
In Thunderbird, go to Settings > General > Config Editor (at the end of the page). This will open the exact same style of menu like about:config in Firefox. Look for the exact same preference, and make the necessary fractional value change as you see fit.
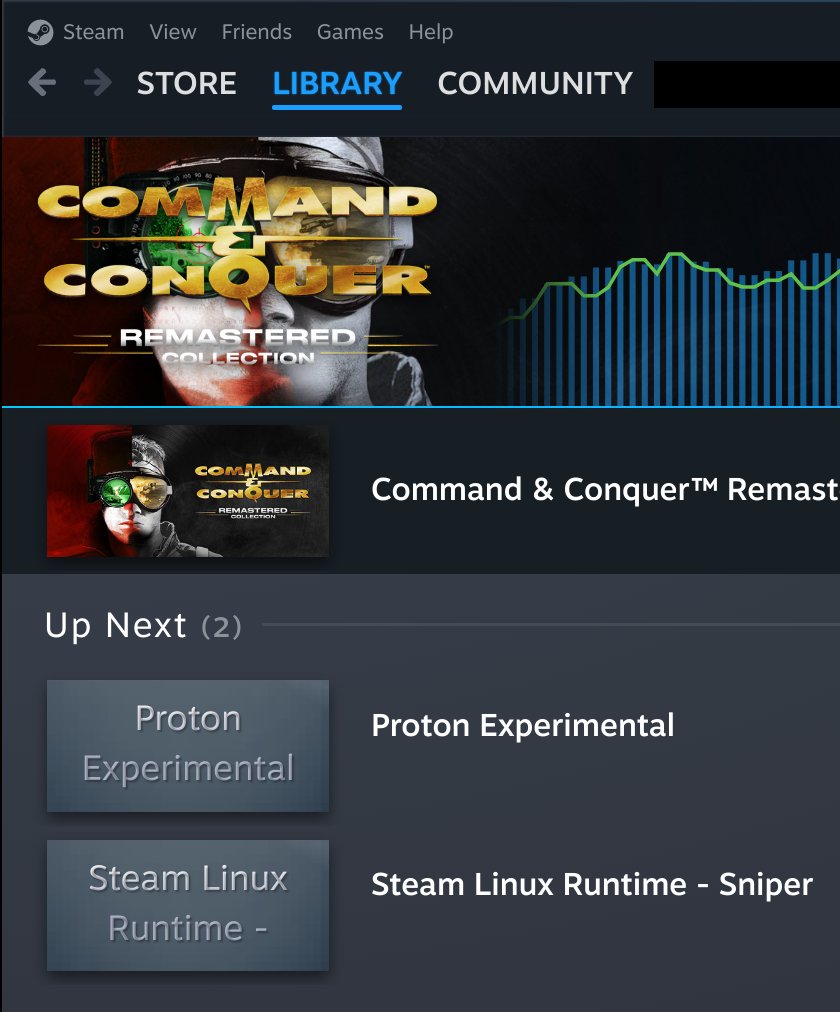
Steam
To make the Steam client UI larger, you can do the same thing as we did with Chromium-based browser application desktop file, or you can individually edit any application launcher settings or any system menu entry. For example, in the Plasma desktop environment, you can edit the main menu Steam launcher command.
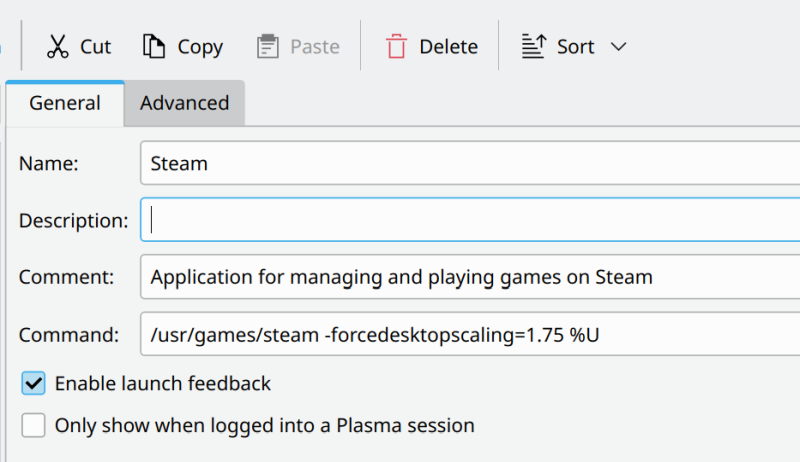
Look at the Command: field. Add the following:
-forcedesktopscaling=X.Y
So that it reads something like:
/usr/bin/steam -forcedesktopscaling=1.5 %U
You can also do this on the command-line, or create your own custom launcher/shortcut.
QT-based programs
For any software developed using the Qt framework (like say Maxwell Render or any KDE app), you need to add an environment variable QT_SCALE_FACTOR to the application's command line. For example, for VLC:
/usr/bin/vlc %U
To this line here:
QT_SCALE_FACTOR=1.XX /usr/bin/vlc %U
Use any scale, like 1.16 or 1.25 or whatever you want. On a side note, you can also use sub-1 values to make the UI smaller if needed. I did this with the Maxwell Render software to make it fit fully and completely onto the screen.

GTK-based programs
Same logic, as above, except we need a different environment variable GDK_SCALE. For any relevant application, simply prepend it:
GDK_SCALE="XX" "application command"
Snaps
Most of the tricks outlined above work for snaps, too, except the paths to application desktop files, and the commands are slightly different. Using VLC as out example from earlier, you can either edit the desktop file, or add the environment variable on the command line:
Exec=env BAMF_DESKTOP_FILE_HINT=/var/lib/snapd/desktop/applications/vlc_vlc.desktop QT_SCALE_FACTOR=1.XX /snap/bin/vlc %U
QT_SCALE_FACTOR=1.25 snap run vlc

WINE programs
You can also scale any Windows software running under WINE. Open a terminal window, type winecfg. This will launch the WINE configurator. Click on the Graphics tab. Change the default value of 96 to whatever works best for you. To match the system/desktop scaling factor, try to use the same multiplication factor, e.g.: 1.25 or 1.5. If you need different WINE apps to scale differently from one another, you will then need to install them in their own prefix (WINEPREFIX) one by one, and run winecfg for each prefix separately.

For multiple DPI configurations, you would then run something like:
WINEPREFIX=~/.wine-program-1 winecfg
WINEPREFIX=~/.wine-program-2 winecfg
WINEPREFIX=~/.wine-program-3 winecfg
...
DOSBox programs
Similarly, you can also scale DOS programs running inside DOSBox, so they are actually usable. Open the ~/.dosbox.conf or ~/.dosbox/dosbox.conf file, and then edit the following four entries:
windowresolution=YYYYxZZZZ
output=VALUE
scaler=VALUE
aspect=VALUE
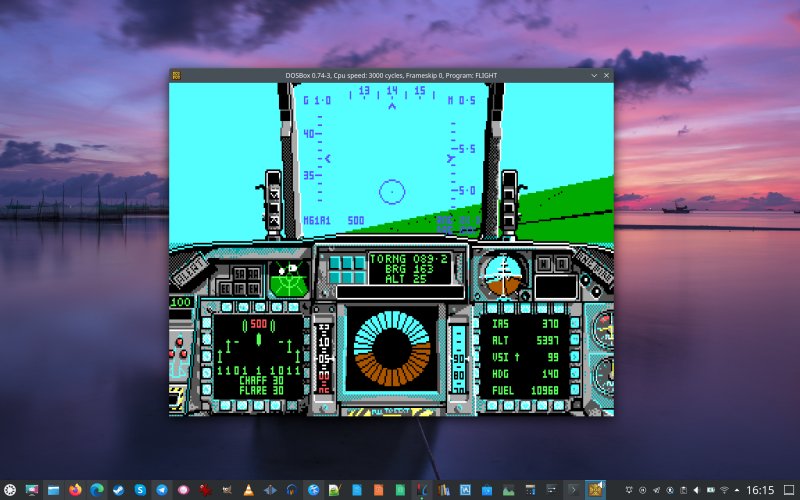
- windowresolution - Whatever resolution we want, should be 4:3, or 16:10, ideally. On my Slimbook Executive, with a 3K display, I started with 1600x1200 and eventually chose the resolution of 1920x1440 as it fits nicely in the center of the screen. You can choose any resolution you fancy, and you may even choose to run DOS programs in a full-screen mode. However, I'd recommend a window.
- output - The method by which the "picture" will be drawn on the screen. Ideally, you want the output set to openglnb - this means OpenGL with no bilinear filtering. This means the pixels will be pixely, and won't be smoothed, resulting in a less blurred and more DOS-like experience. This resembles the old CRT monitors more accurately, and you won't feel like you're playing a super-low-res thing that has been artificially over-smoothed.
- scaler - The method by which the "picture" will be enlarged. The scaler is& used to scale the window to a larger size. You can try any which one you like, but normal3x is probably the best, easiest choice to begin with. DOSBox 0.74 supports 3x. A newer version (like 0.75, still in development) supports 5x. Try, see what gives.
- aspect - Wherever programs should preserve their aspect ratio when running. When set to true, this means that DOSBox will resize its window for any game that runs in a different than 4:3 or 16:10 ratio, so you won't end up with bad proportions (vertically or horizontally stretched elements).
Thus, the output will be something like:
windowresolution=1920x1440
output=openglnb
scaler=normal3x
aspect=true
You can try different resolutions, e.g.: 1600x1200, as shown below:
Conclusion
And there we go. The five years of scaling and high-resolution desktops. We have multiple scenarios, multiple usecases, tons of different hardware. We're talking Intel and AMD integrated graphics, Nvidia discrete graphics, displays with 1K, 2K, 3K, and 4K resolutions, all sorts of desktop environments, all sorts of application families. From ancient DOS programs via state-of-art Plasma to Windows software and everything in between.
Hopefully, you will find value in this mega-tutorial. It covers many different uses and aspects (literally and figuratively), and should help you find just the right proportions for your programs on modern, high-density, small-scale displays, typical of the modern desktop. If you have any other requests that you'd like me to look and test, please drop me a line. And we're done. Enjoy your well-scaled systems!
Cheers.