Updated: October 16, 2024
Several days ago, I showed you how to become an awesome memeista. We converted an HD video into an HD GIF file, so you can do the same, and share your wonderous creations with your friends, if you have any. We used the awesome ffmpeg tool for that task. The only caveat? Our GIF was huge!
Today, I would like to revisit the topic of GIF files from a different angle. Multiple angles to be exact. I will show you how to create GIF files using GIMP, ImageMagick (convert), and ffmpeg. I will also highlight the usage differences and notable advantages of these tools. Now, we will do our work in Linux, but since all of these tools are also available for other operating systems, the principle is the same. The only thing that will change is how you install and set up the programs. So let's begin then. Let's GIF it, GIF it good.

Create GIF files with GIMP
GIMP is a rather friendly, open-source image editor. I like it. Select all of the images you wish to put together into an animated file, and open them in GIMP. Now, one by one, copy the different images and paste them as new layers in a single file. If you want all of your frames to have an identical transition time, you don't need to do anything else. Simply export the project as GIF, and choose the transition time for any layer (frame) with an unspecified delay. By default, GIMP does 100 ms.


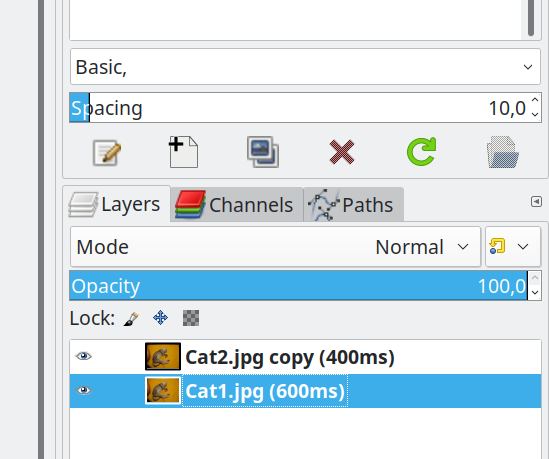
If you want your frames to have different delays, then, in the Layers toolbox, click on each layer, and add the desired time delay, in milliseconds. For example, if your layer is named Dedo copy.jpg, change the name to:
Dedo copy.jpg (170ms)
This will add a 170ms delay to your frame. You can use any delay you need:
- The GIF format is limited to 256 colors.
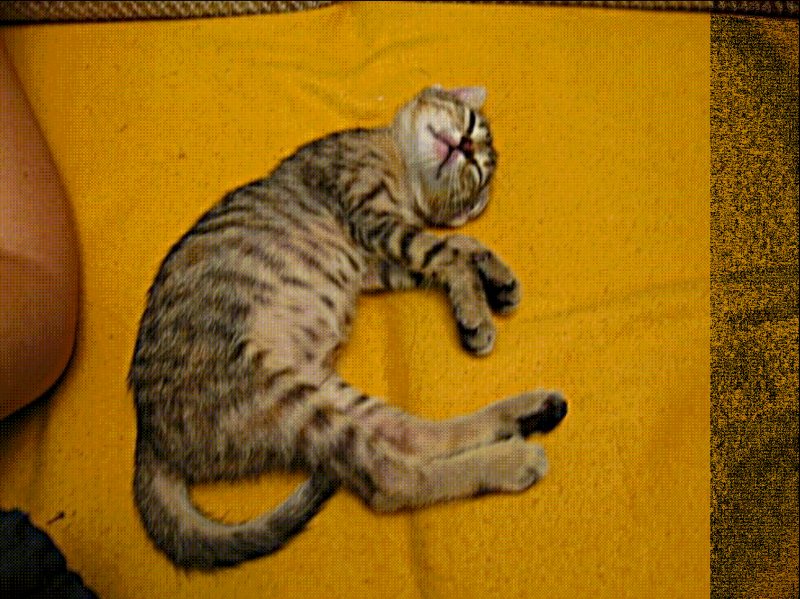
- The file will be quite large. My test GIF of a cute kitten only has 2 frames, i.e., two source layers. The original files, Cat1.jpg and Cat2.jpg weigh only 528 KB and 837 KB, respectively, at 2880x2160 px. Upscaled from the original image using the awesome Upscayl tool. Now, the GIF file weighs 3.9 MB.
The question is then, is there a way to work around the 256-color limitation, and make the GIF look nicer?
GIMP, indexed mode
A way around the 256-color problem is to change your image mode to Indexed. Image > Mode > Indexed. Then, in the window that pops open, increase the maximum number of colors from default 255 to 256, and in the section titled Dithering, select a dithering algorithm. I've found both Floyd-Steinberd (reduced color bleeding) and Positioned to work well. They definitely help make the GIF files look nicer.

Re-export your GIF file. The caveats:
- The 256-color limitation still remains, even though it's lessened.
- There is a bit more noise in the image compared to the RGB mode.
- The file size is now 6.9 MB.
The other big problem with GIMP is that there's a lot of work involved if you have tons of frames. Manual work in GIMP is good enough for small batches of files, but what if you have hundreds of images? Well, it's time to hit the command line.
ImageMagick (convert)
We've recently used the program to create resized, upscaled versions of different files, in addition to using Upscayl. Convert was quite useful in that it produced reasonably detailed output, with minimal loss of information, and it can be used on any which computer with integrated graphics, as opposed to most if not all AI-scaling tools that require discrete, relatively modern graphics card to do the same.
To create GIFs with convert, you would do something like:
convert -delay [time] -loop 0 [input files] output.gif
As an example, it could be:
convert -delay 100 -loop 0 Cato*.jpg Cato-converto.gif
What do we have here?
- We specify a delay between frames - by default, ImageMagick uses 1/100th of a second (or 10 ms) as the delay fraction, therefore, if you want your GIF to show changes once per second, then you need a quantifier of 100.
- We specify the loop option (0 means forever).
- We have the input files, a series of .jpg images.
- And finally, we have the output GIF file.
The results were good. I found the color loss to be lesser than what GIMP did, but there was a bit more noise in the images. The image size is even bigger than before, 7.8 MB. That's almost 5x more than what we had with the two original JPGs.
Ffmpeg
The third tool we want to use is ffmpeg, much as we did in the HD video example. To wit:
ffmpeg -framerate [rate] -f image2 -i [input files] -r [output rate] output.gif
An example:
ffmpeg -framerate 1 -f image2 -i Cato%d.jpg -r 24 Cato-ffmpeg.gif
What do we have here?
- We specify the framerate for my input files - this effectively governs the delay between frames. The number is effectively 1s/[rate] in terms of actual transition value.
- We specify the type of conversion we're doing (image files).
- We specify the input files - ffmpeg is a bit finnicky in this regard, in that it wants input files to be serialized, and you need to tell it what sort of "format" you're using. In this cample, Cato%d basically means there will be a sequence of digits in the file names, e.g.: Cato1.jpg, Cato4.jpg, etc. You do need to pay attention how many digits you use or how you number your files, as you could end up with frames out of sequence.
- We specify the output rate (-r). This seems misleading, but if you do not specify this value, ffmpeg may get confused, and your output will be wrong. In other words, it may assume your output only has one or two frames, and then it will "duplicate" them to match the full-second time elapse.
- We specify the output file name.
The results were ... weird. Interestingly enough, in Linux, the file looks superb. The size is also relatively small, at 3.9 MB. However, when I opened the GIF in Windows, I noticed weird artifacts. For some reason, for example, IrfanView did not render this one well, in comparison to the others.
Optional: Not GIF, WebP
I don't like the Web* formats. Neither, WebP nor WebM. But, for the sake of this article, I also decided to convert my JPG files into a WebP image. It natively supports animation, so this ought to be an interesting little exercise.
ffmpeg -framerate 1 -f image2 -i Cato%d.jpg -r 24 Cato-ffmpeg.webp
I did the conversion with ffmpeg, to rule out any potential "problems", as I encountered with the GIF format. The end result was pretty impressive, I must say. The output file weights only 302 KB, which is 10x to 20x smaller than the other formats, the color profile is decent, and while the image quality isn't stellar, it definitely isn't 10x or 20x less good.
P.S. I am also aware there's JPEG XL, but that's a future article ...
Comparison among methods
First, I am not going to upload 24MB worth of GIFs to this one article, to conserve bandwidth, mine and yours. Instead, here are the reduced-size versions of these GIFs. You won't necessarily see all of the details as well as you would like, but you will get a pretty good idea of what each tool does.
In all of the cases, the two 2880x2160px JPGs used for the GIF weight a total of 1.3 MB combined.
| Tool | GIMP | GIMP (ind) | Convert | Ffmpeg | Ffmpeg (WebP) |
| Converted size (MB) | 3.9 | 6.9 | 7.9 | 3.9 | 0.3 |
| Colors | OK | Better | Better | Better | Best |
| Quality | Good | Better | Best | Good | Average |
| Support across viewers | Good | Good | Good | Average | Good |
GIF made with GIMP, RGB mode:

GIF made with GIMP, indexed mode:

GIF made with convert:
GIF made with ffmpeg:
WebP made with ffmpeg:

Conclusion
There we go. This is probably the most comprehensive GIF tutorial EVAR. Well, definitely in the top three. Or something. If you want to create animated images out of your life's digital collection, you can. In this article, I've outlined four, or rather, five different methods. There's GUI and command line, whatever makes you happy and comfortable.
Please be aware that GIF isn't the perfect format for everything - sending a video might actually be preferable. Ipso facto, a muted video can be a GIF, if you like. In my testing, I noticed that GIF files can come out quite large, and that there might be issues with colors. You need to take this into consideration. Finally, you could also try the WebP format. I don't like it, personally, but it does the job, here, in this regard. Well, hopefully, this was comprehensive and entertaining enough. More formats and testing to come. Take care.
Cheers.