Updated: September 6, 2014
All right, let's do it. A few weeks back, I tested CentOS 7, and it did not really impress me. It had simply been rolled out too early, and there were no third-party packages available to make it more desktop-oriented and fun. Then, some time later, magic happened, Nux gave us the needed repositories, and CentOS became perfect once more.
In the desktop guide that explains how to beef up CentOS to be modern, beautiful and ultra-functional, I omitted a bunch of tips and tricks. On purpose. One of these is the installation of Nvidia graphics drivers on the selected machine, which turned out to be a handy but interesting exercise in the previous, CentOS 6 version. We will do this again, and there are some differences, so you ought to pay attention. Follow me.
How are we going to do that?
After you setup the extra repositories, you will discover that the Nvidia drivers may not yet be available. And that you have the Nouveau open-source driver running instead. Sort of. So we will have to do a bit of hard work purging the existing driver, then installing the proprietary blob. And because we don't have the driver in the repos, we will manually compile the whole thing.
Step 1: Download the driver
Head to Nvidia site and download the driver. Very simple.
Step 2: Update your system & build tools
Like we did with CentOS 6, it is important to fully update your system before proceeding with the driver installation. The reason for this is that your running kernel may be older than the kernel source available in the repositories, so this will cause compilation conflicts. Therefore, first max. update the system:
yum update
Reboot if necessary for your latest kernel to load. Then, install kernel source, kernel headers, make and gcc, just like in the good old times!
yum install kernel-devel kernel-headers gcc make
Compare your running kernel with the installed source:
uname -r
rpm -q kernel-devel
If the two do not match, upgrade and reboot until they do:
yum -y upgrade kernel kernel-devel
Once this step is complete, we can move on.
Step 3: Blacklist Nouveau
The Nouveau driver ships with CentOS, enabled by default. It's this driver that allows the fancy high-resolution boot splash and whatnot. If you want Nvidia, then you will have to remove this driver first.
Well, I said Nouveau driver is running, but not really. In my case, right after the GRUB menu, there was a kernel message that Nouveau had invalid opcode, and this meant no graphical acceleration whatsoever, even though the system had the modules loaded in the kernel. But these were just dummy stubs, and I could remove them easily, with the modprobe command, even without the force flag.

Does this pose a problem? Maybe. But let's do it cleanly. We will blacklist in two different ways. Like before, you can edit the bootloader menu. But now, instead of GRUB, CentOS is running the new GRUB2, and that could complicate things for some of us. But no worries. You can append the rdblacklist=nouveau string to the default boot options under /etc/default/grub. Or you can edit the boot menu on the fly, on reboot.

If you do edit the GRUB2 default options, you will need to recreate the grub.cfg file, and in the RedHat family, as I've demonstrated with Fedora in the updates section of my most awesome GRUB2 tutorial, you do this as follows:
grub2-mkconfig -o /boot/grub2/grub.cfg
You should fiddle with GRUB while testing. However, the safest and most efficient way is to blacklist the module using the /etc/modprobe.d/blacklist.conf file. Simply add a line that reads blacklist nouveau into this file, save and reboot. The next time the system comes online, Nouveau will not be present in the memory. You can verify using the /sbin/lsmod command. Again, please consult my first Nvidia guide for CentOS and my Linux commands article, linked further up, for details on how to achieve this.
Step 4: Install Nvidia proprietary driver
Now, we need to drop to text-only console, because the driver cannot install when the graphics thingies are in use. To do this, switch into runlevel 3. This is still done like before, for compatibility purposes, even though CentOS has switched away from traditional RC scripts to code-monkey object-oriented event-based whatever the new stupid thing is called, systemd or such.
init 3
Login as root. Find the downloaded Nvidia driver on your disk. Make the file executable and then run it. Follow the prompts provided by the Nvidia installer text wizard. You should also make sure to install the 32-bit libs.
chmod +x <Nvidia file>.run
./<Nvidia file>.run
Once this step is complete, go back into runlevel 5.
init 5
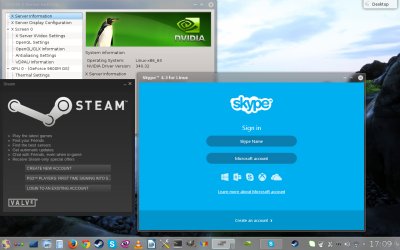
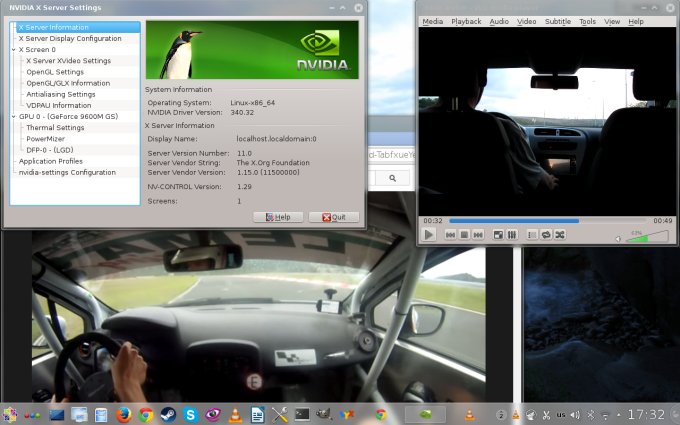
You will see Nvidia splash, which should indicate you're doing good. But just to be sure, open the Nvidia control panel and make sure the driver is working correctly. Testing with some games is always a good idea.
Step 5: Test
And now we have some fun!


Conclusion
There you go, another obstacle cleared. This tutorial is foolproof, and will essentially work for any kind of distro out there. The only downside is that you will need to recompile the driver if there's a kernel update. But other than that, it's fine.
I hope you learned something new. As you can see, even though we're facing GRUB2, and some things have changed, essentially, the predictable science of this fine distro remains, and you can tame it to your liking. Hopefully, this guide, plus the perfect desktop howto, and several more pimping, beautification and other cool articles coming your way will convince you to use CentOS in your production setup, because it's simply amazing.
P.S. If you find this article useful, please support Dedoimedo.
Cheers.