You have installed Windows. It's time to configure a number of other items.
Installation of drivers
Install your video drivers. Change your monitor refresh frequency and screen resolution to fit your needs. Install your audio drivers. Make sure you have properly installed the drivers by testing out some sample music track. Install your other drivers, for instance USB 2.0 drivers, printer, UPS etc. After you have successfully installed your environment, it's time for some true geek time.
Tweaking
Windows XP ships out in a default configurations that is rather loose. It is meant to suit as many people as possible at the same time, which is rather impossible. You can make some small yet pretty powerful changes that will make the overall feel a whole lot smoother.
Please note that this guide is not meant to be a comprehensive Windows user guide. You can get a pretty reasonable help by pressing F1. Furthermore, there's a wealth of information available online.
Most of the instructions following will not be accompanied with screenshots. There are too many of them, and it would get rather boring after a while. However, I will give you a basic overview to help you get oriented, though most likely if you decided to read through this article AND decided to install Windows XP from scratch in a VMware Player (or for real), the chances are you most likely do not need a basic overview of the Windows XP functionality.
Taskbar
Taskbar is a field between the Start Menu and the System Tray and will show your active applications as small bars. It can also serve to place shortcuts (as Quick Launch).

Start Menu
Start Menu gives access to all of the programs and applications installed on the computer.

System Tray
System Tray is used to show small icons of programs loaded into memory and running.

Performance & annoyance tweaks
The below tweaks will improve visual performance, make the Windows look less flashy and free hard disk space by reducing the unnecessarily large default storage certain functions take.
If you have doubt, do not do these steps without being sure how to revert them. Do not do these steps if you do not understand what they mean. Like I said, this guide is not a step-by-step Windows help. Use the Help and Internet to get fully acquainted with Windows. You can always do these tweaks at a later time.
Windows XP Tour
Click on the Windows XP Tour icon in the System Tray.
When the Window XP Tour pops up, click Cancel and you will never be bothered again.
Disable Security Center alerts
Right click on the Security Center system tray icon > Open Security Center. On the left-hand side, under Resources, click on the bottom option Change the way Security Center alerts me. Untick the three options (firewall, anti-virus and automatic updates).
Changing Start Menu view to Classic
Right click on the Taskbar > Properties.
Under Taskbar options, tick Show Quick Launch.
Under Start Menu options, tick Classic Start menu.
Changing Windows display to Classic
Right click on the Desktop > Properties.
Under Themes, select Windows Classic theme.
Change Control Panel view
Start > Settings > Control Panel.
Switch to Classic View.
Resize the System Restore space
Right click on My Computer > Properties.
Under System Restore settings, slide the bar to desired percentage.
Resize the Recycle Bin space
Right click on Recycle Bin > Properties.
Slide the bar to desired percentage.
Resize the Internet Explorer cache
Right click on Internet Explorer > Properties.
Under General > Temporary Internet files click Settings.
Select the cache size to no more than 50-100MB.
Format the remaining hard disk(s)
We have created a roughly 2GB size hard disk while partitioning. It's time to format it now and make it usable. Double click My Computer. Select the hard disk (most likely local disk (D:), certainly NOT local disk (C:)), right click > Format.
We want to use this hard disk for personal data. Therefore, we will format it as FAT32, because we might like to be able to write to it from other operating systems, like Linux. Rename this disk to DATA or something similar.
This is, of course, an optional step. You may or may not create additional partitions while installing the system for real. It's up to you. I advise you to use partitions, as they improve security and order.
Creating a Limited User Account (LUA)
Most people use their default administrator account. This is OK, if you know 100% what to do in case of serious malware infection. Otherwise, setting up a limited account can be a good practice. Regardless of whether your daily needs require that you use administrator account or a limited account, it is recommended that you:
- Password protect the default administrator account. To do this, boot into Safe Mode, log in as the Administrator, head in to Start > Control Center > User Accounts. Password protect the account with a strong password (something like acD221oOm23^K2W). We have done that during the setup, but it does not hurt to check out. This can also be a good practice to see what Safe Mode is and how it works. To boot into Safe Mode, press F8 during the boot up. This might not work in VMware Player.
- Disable the Guest account, if it isn't already.
- Delete the .ASP account, if it exists.
- Reboot into normal mode and password protect your own account with a solid, strong password.
To create a limited account:
- Access User Accounts (see above) and select Create a new account.
- Select a name for your limited account.
- Select the type for your limited account; naturally you want to selected Limited.
- Create the new account.
Create a new account:

Name the new account:

Select the account type to be limited:

Once it is created, you can rename it if you like, change its icon and password protect it.

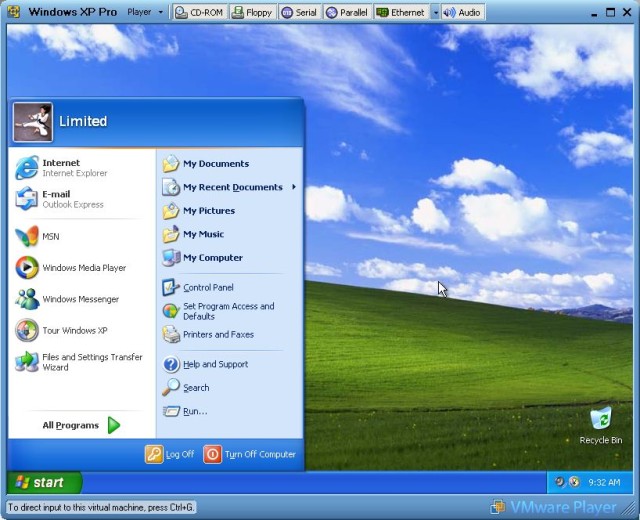
To see what a Limited User account looks like, just log off as Thor (or whatever your name is) and log in as Limited.

As you can see, Limited is a new separate account and all previous changes we did no longer apply. We will have to configure things again.
Limited account should be indeed limited. How can we know Limited is restricted?
Let's try to access the Group Policy editor. Group Policy Editor (gpedit.msc) is a powerful tool that allows any Windows administrator-type user to set global or user rules called Restriction Policies. These policies can range from white-listing files that can be executed on the computer to preventing the use of command line, prevent access to Control Panel and much more. It can also be used in a very beneficial way to improve privacy and security. I will address that in another article.
To start the Editor:
Start > Run > gpedit.msc

Indeed, if we try to access the gpedit.msc, under a limited account we expect to receive an error message.

As expected, Limited is a limited account and thus cannot access gpedit.msc. In a way this is a good thing. If you cannot access certain options, neither will virii, trojans and other types of malware be able to do that. As a limited account user, you will not be able to install software. Even if you inadvertently trigger a bad file on your desktop, it will not be able to propagate and cause harm. Limited account is a good way of preventing the user himself from making serious judgment mistakes in his day-to-day use. You should bear in mind that these restrictions could impair functionality of certain programs. You will also have to log in as the administrator to perform system updates, like anti-virus definition updates.
To run applications that require administrative privileges, you can try to use the Run as ... shell option - right click on an application and select Run as ... Alternatively, you can use DropMyRights to run software with reduced (limited) privileged under an administrator type account. By the way, changing desktops in the administrator and limited account is a good idea. It's your best visual indicator which account you're using.
Internet
Create your first System Restore point; this will be your "reference" restore point, a clean system installation. Configure your Internet connection now - if you're using direct connection, just plug the line back into the socket. If you're using VPN dialers, call your ISP and ask them to help you configure one.
Updates
Before installing Windows XP on a PC, I suggest you create a CD containing all your favorite software, like firewall, anti-virus, java engine, browser, mail client, and more. That way, you will not require an Internet connection to properly secure your PC. If you do not have your favorite tools ready, do it like this then:
- Open Internet Explorer once. Go to Mozilla Firefox site. Download and install Firefox. Make it your default browser.
- Head to the site of your favorite firewall vendor. If you do not have one, or want a free solution, try ZoneAlarm Free. Install the firewall.
- Head to the site of your favorite anti-virus vendor. If you do not have one, or want a free solution, try AVG Free. Install the anti-virus. Perform a full update. If firewall prompts you, allow it.
- Now, perform Windows Update. Install the patches you want. Usually, you would like to install most of the critical patches. But I do suggest you read carefully about each update and decide whether you really need it. Since you may have the automatic updates turned off, make this check at least once a month. Microsoft usually release updates on first Tuesday every month.
- You might want to use Java on your computer. You might want to try Sun Java.
- You might want to use a mail client. I suggest you try Mozilla Thunderbird rather than the default Outlook Express.
- You might want to have an Office suite on your PC. Open Office is a great, free product.
General rules that can make your PC life easier
You might want to defragment your hard drive once a month or so to boost its performance. Keep your private data separate from the operating system - on the second partition we created. If you have a large hard disk, or better, several hard disks, do not hesitate to make even more partitions. Back your data frequently across the system (partitions, hard disks, other computers) and to hard copies (CDs, DVDs, USB drives).
Create a System Restore checkpoint before installing any software. That's it. Your computer is pretty much setup. You have learned how to install Windows XP, create multiple partitions, create a user account, all of that in less than two hours. It's time to lean back and relax. You won't be needing those technicians any more. Who knows, you might even teach them a trick or two?
Enjoy!